Your First Interview: From Idea to Published Episode
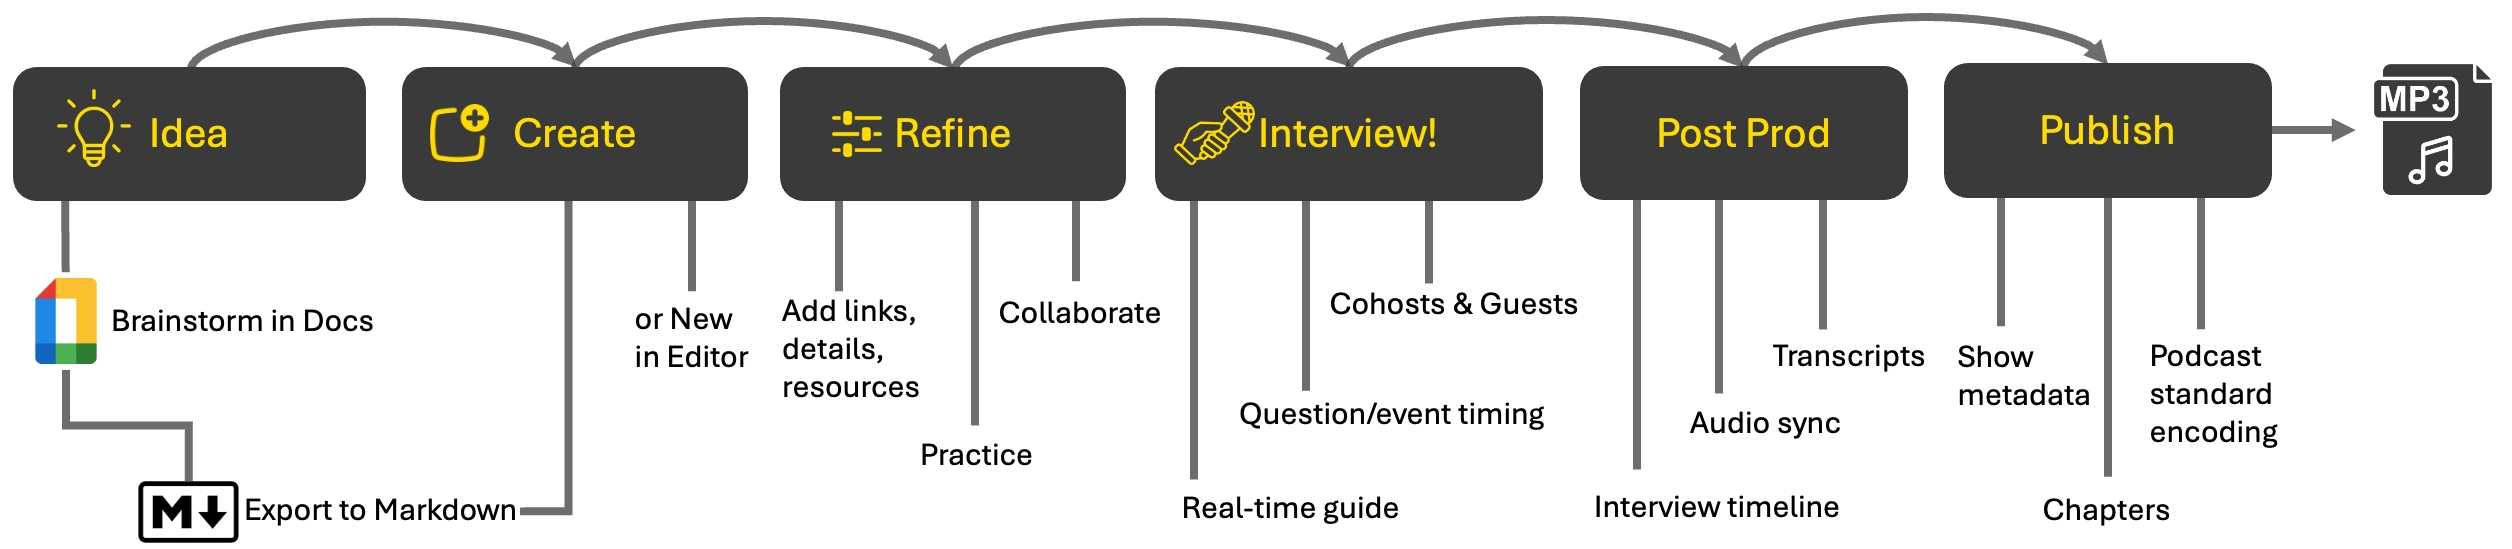
Let's Walk Through a Complete Experience
Meet Sarah, a sustainable tech entrepreneur. You're excited to interview her for your podcast about innovation and environmental impact. Let's see how InterviewCue takes you from idea all the way to publishing a polished episode.
Stage 1: Idea
You've scheduled an interview with Sarah about her company's sustainable tech initiatives. She booked a time to record. The interview is on. BTW, we recommend a service like TidyCal for making scheduling as frictionless as possible.
It's time to design the interview. While you can start right away with InterviewCue (we do have a WYSIWYG editor for this), experience has shown that brainstorming usually works best in collaborative document-like tools. Both Google Docs and Notion are perfect partners for InterviewCue because they can export to our import formats.
By starting with something like Docs, you can share the show notes with Sarah (our guest). You can collaborate asynchronously and get a fuller, more polished picture of the topic space with her input.
Here's a typical workflow in this stage:
- Create a doc in Google Docs
- Write down some high-level ideas you think might be interesting based on the guest's public writing/work and the core topic.
- Format the doc/page in H1/H2/details hierarchy.
- H1 for the title (title style in Docs works).
- H2 for each question
- Regular text for details to be shown along with each question.
- Share the doc/page with the guest. Ask for them to "Add a few details to the conversation that you might not have picked up on." Encourage them to keep it to one to two sentences each.
Done! Once you and the guest have had a chance to review and fine-tune the doc, you're ready to integrate it into InterviewCue.
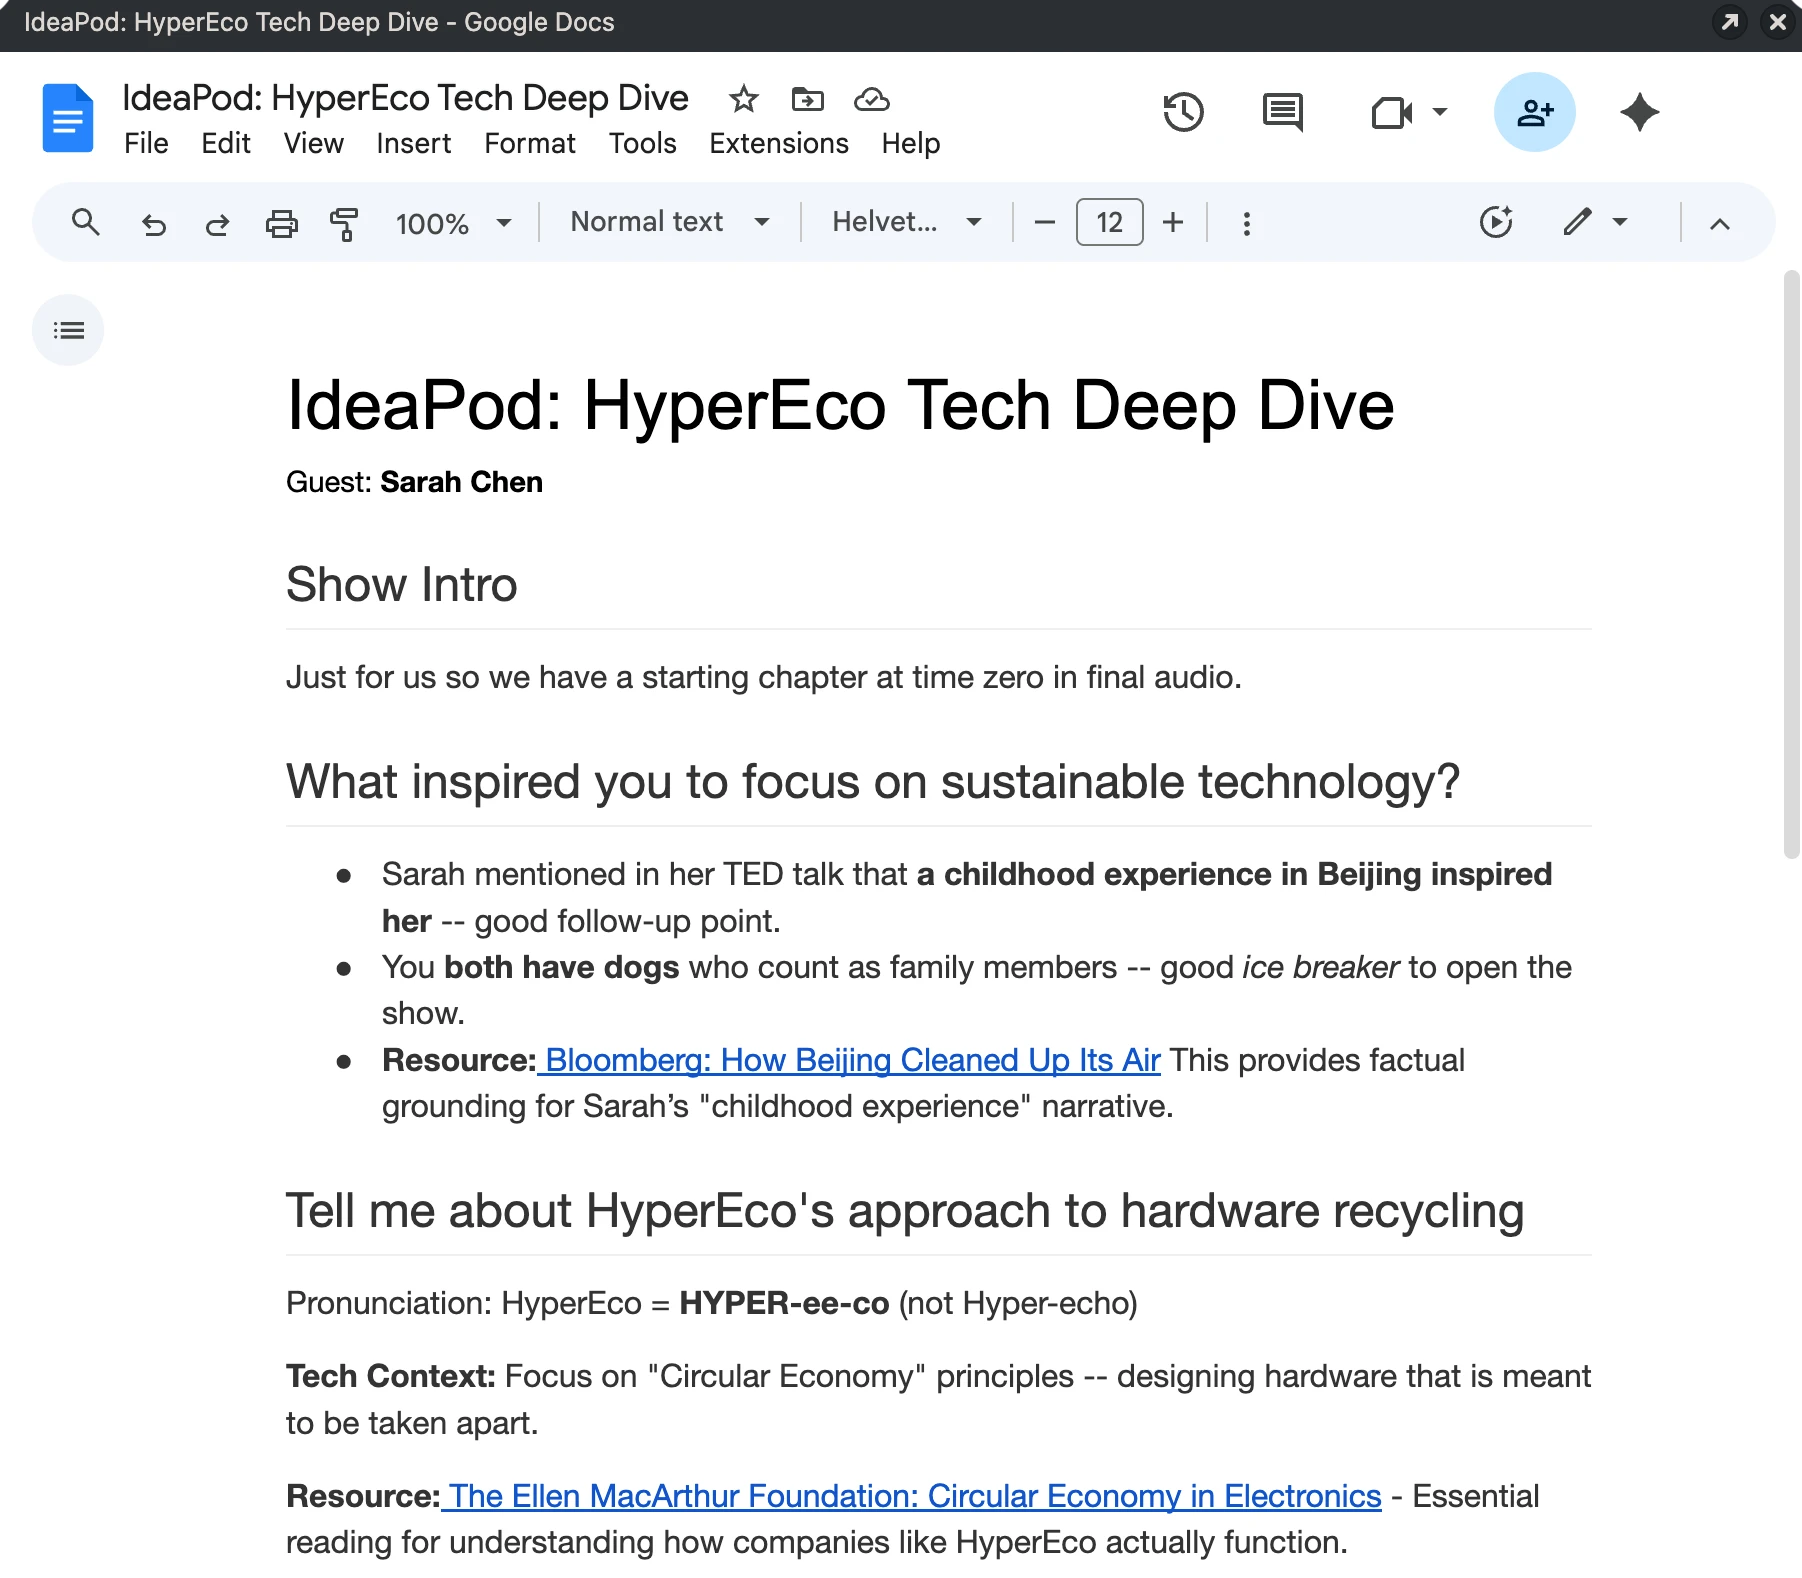
Above is a sample doc from our theoretical interview on Clean Tech with Sarah.
Some tips:
- Link to any resources or additional information in the details of each question, rather than specifying them at the end. During the interview, InterviewCue can organize your external resources by question, and this is how it determines what resources are associated with which question.
- Be careful to avoid having AI write the interview for you. This often results in an interview that is a little stilted and impersonal. It also often provides too much detail. You can and should use AI to help uncover interesting bits of detail. But make the talking points yours.
- Keep the doc as simple as possible. If the doc looks like a script, the guest sometimes starts reading rather than participating in a conversation.
- Try to avoid sharing an empty doc with the guest. This looks like work to them. Start off on the right foot with a thoughtful conversation and ask for extra details. They will be excited to be featured rather than feel like they have one more report to write.
Stage 2: Import to InterviewCue
Now that your interview is nearly final, it's time to bring it into InterviewCue. The quickest and easiest way to do this is to use the Import Interview feature. The import feature takes a markdown file (a simple, structured text file) and converts it into our rich interview format online.
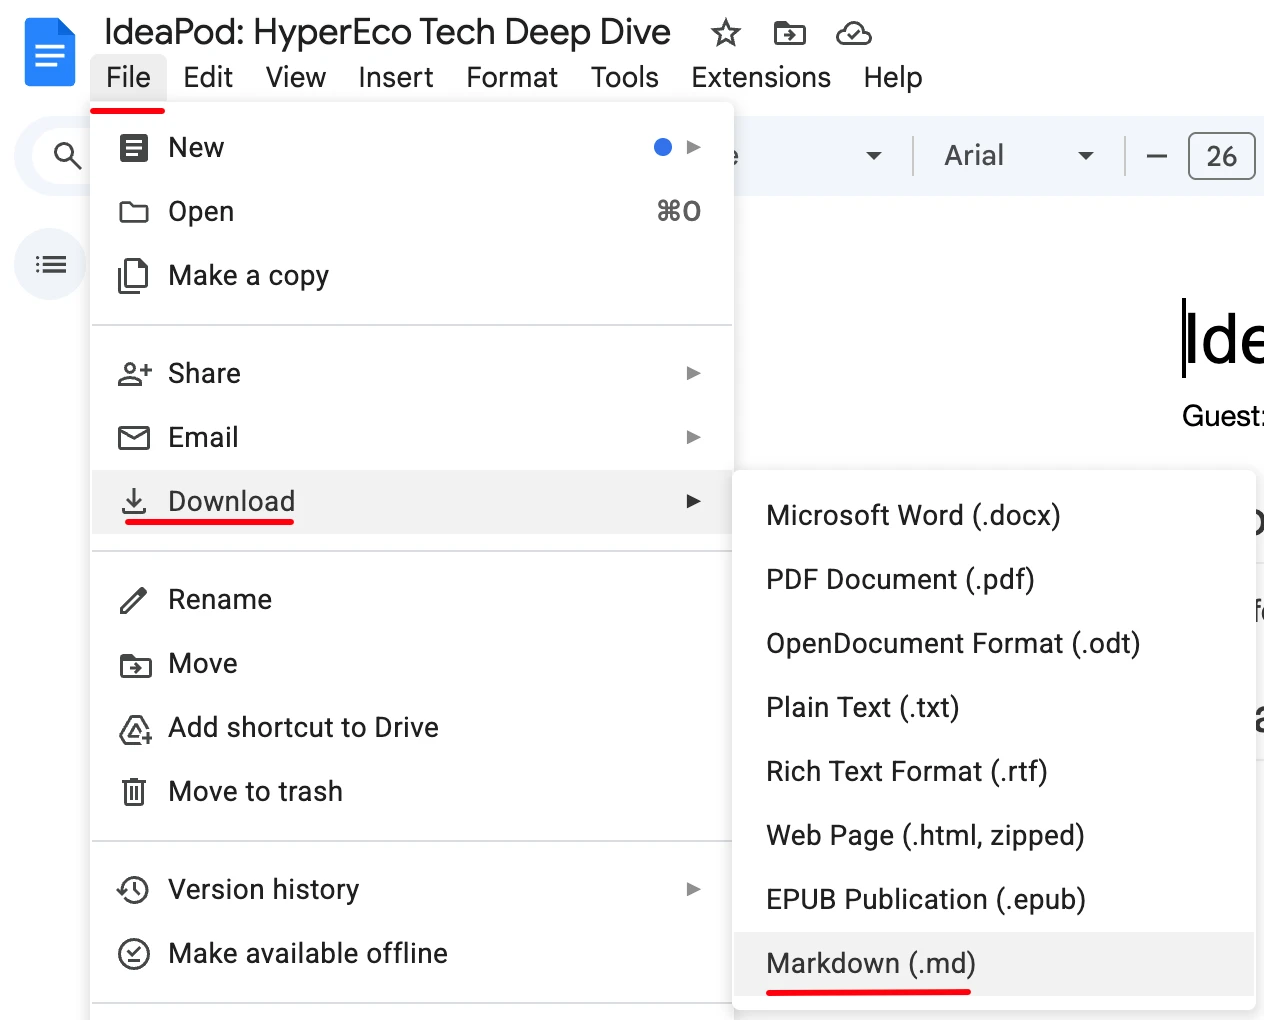
First, you'll want to convert your Google Docs document we worked on above into this text format. Simply choose File > Download > Markdown (.md) in your docs editor:
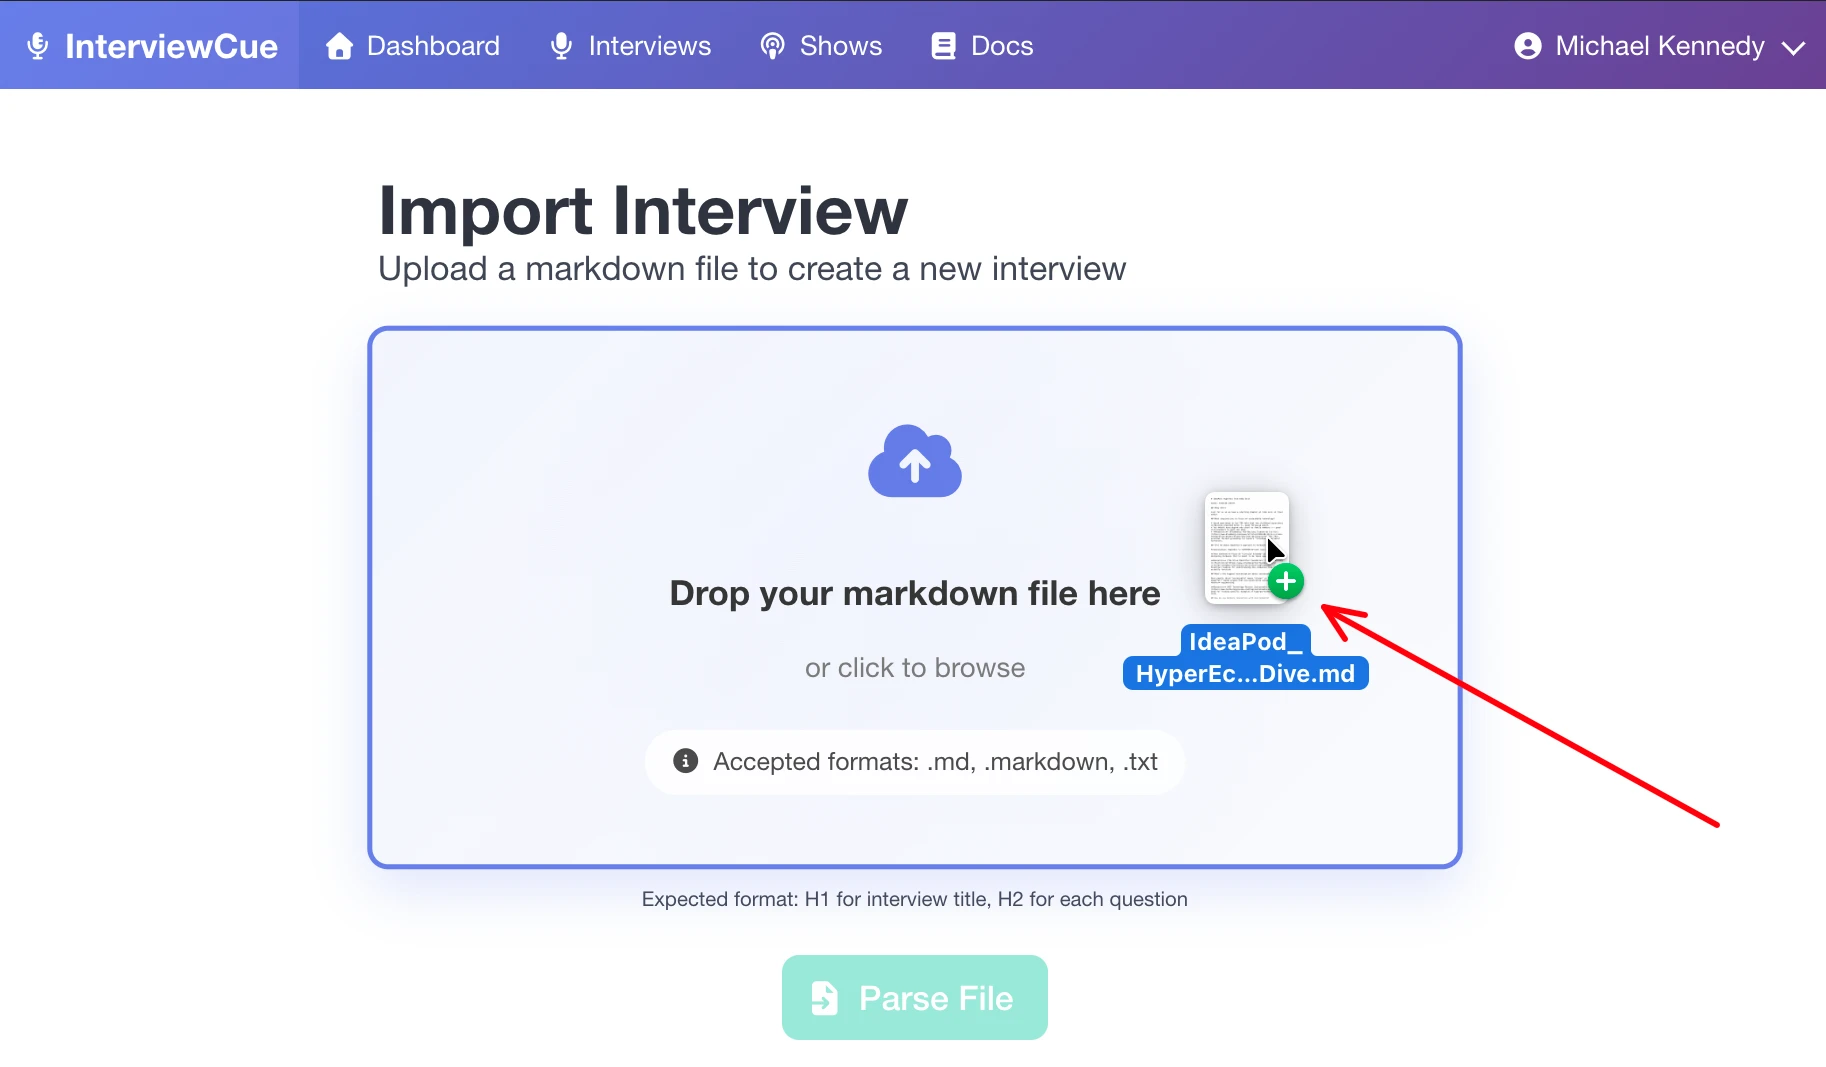
Now, import this into InterviewCue. Simply visit Interviews > Import in the navigation. Then drag-and-drop the file you just got from Google Docs into InterviewCue as you can see here:
Press the Parse File button and review the proposed interview details to make sure everything carried forward successfully. Then enter a few more details in the form (associated show, guest names, scheduled date) and press Create Interview.
Done! Your interview is created and ready to record.
Stage 3: Refine
You got a bunch of information already in place for your interview. But if you come up with another question, more background information, another resource to link to, you can always edit and refine your interview on InterviewCue.
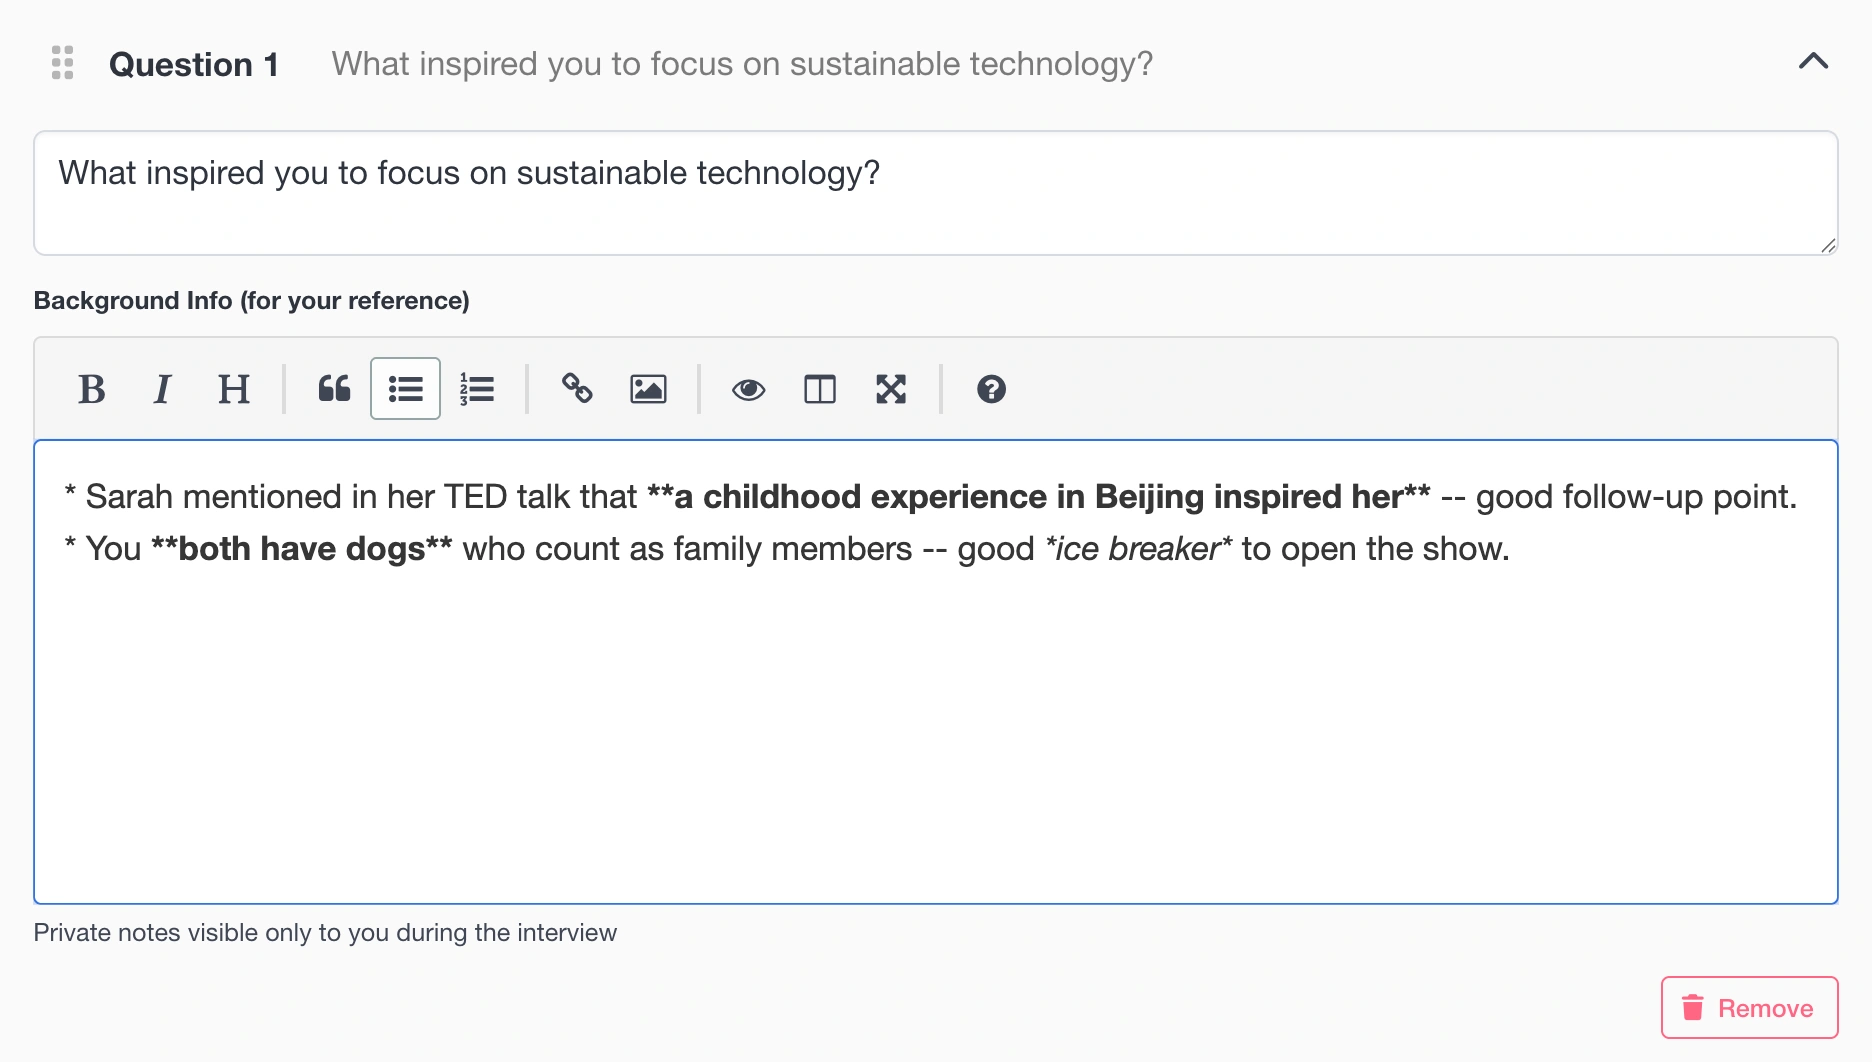
This rich WYSIWYG editor also supports the same markdown format content formatting discussed during import that you may be familiar with. If you're not, don't worry. The hotkeys and toolbar can take care of formatting for you.
Stage 4: Interview
The day has arrived, it's time for the interview with Sarah. Open the interview on InterviewCue. As part of your prep, before you even start speaking with the guest, go ahead and press Start Interview. You'll see a screen similar to this:
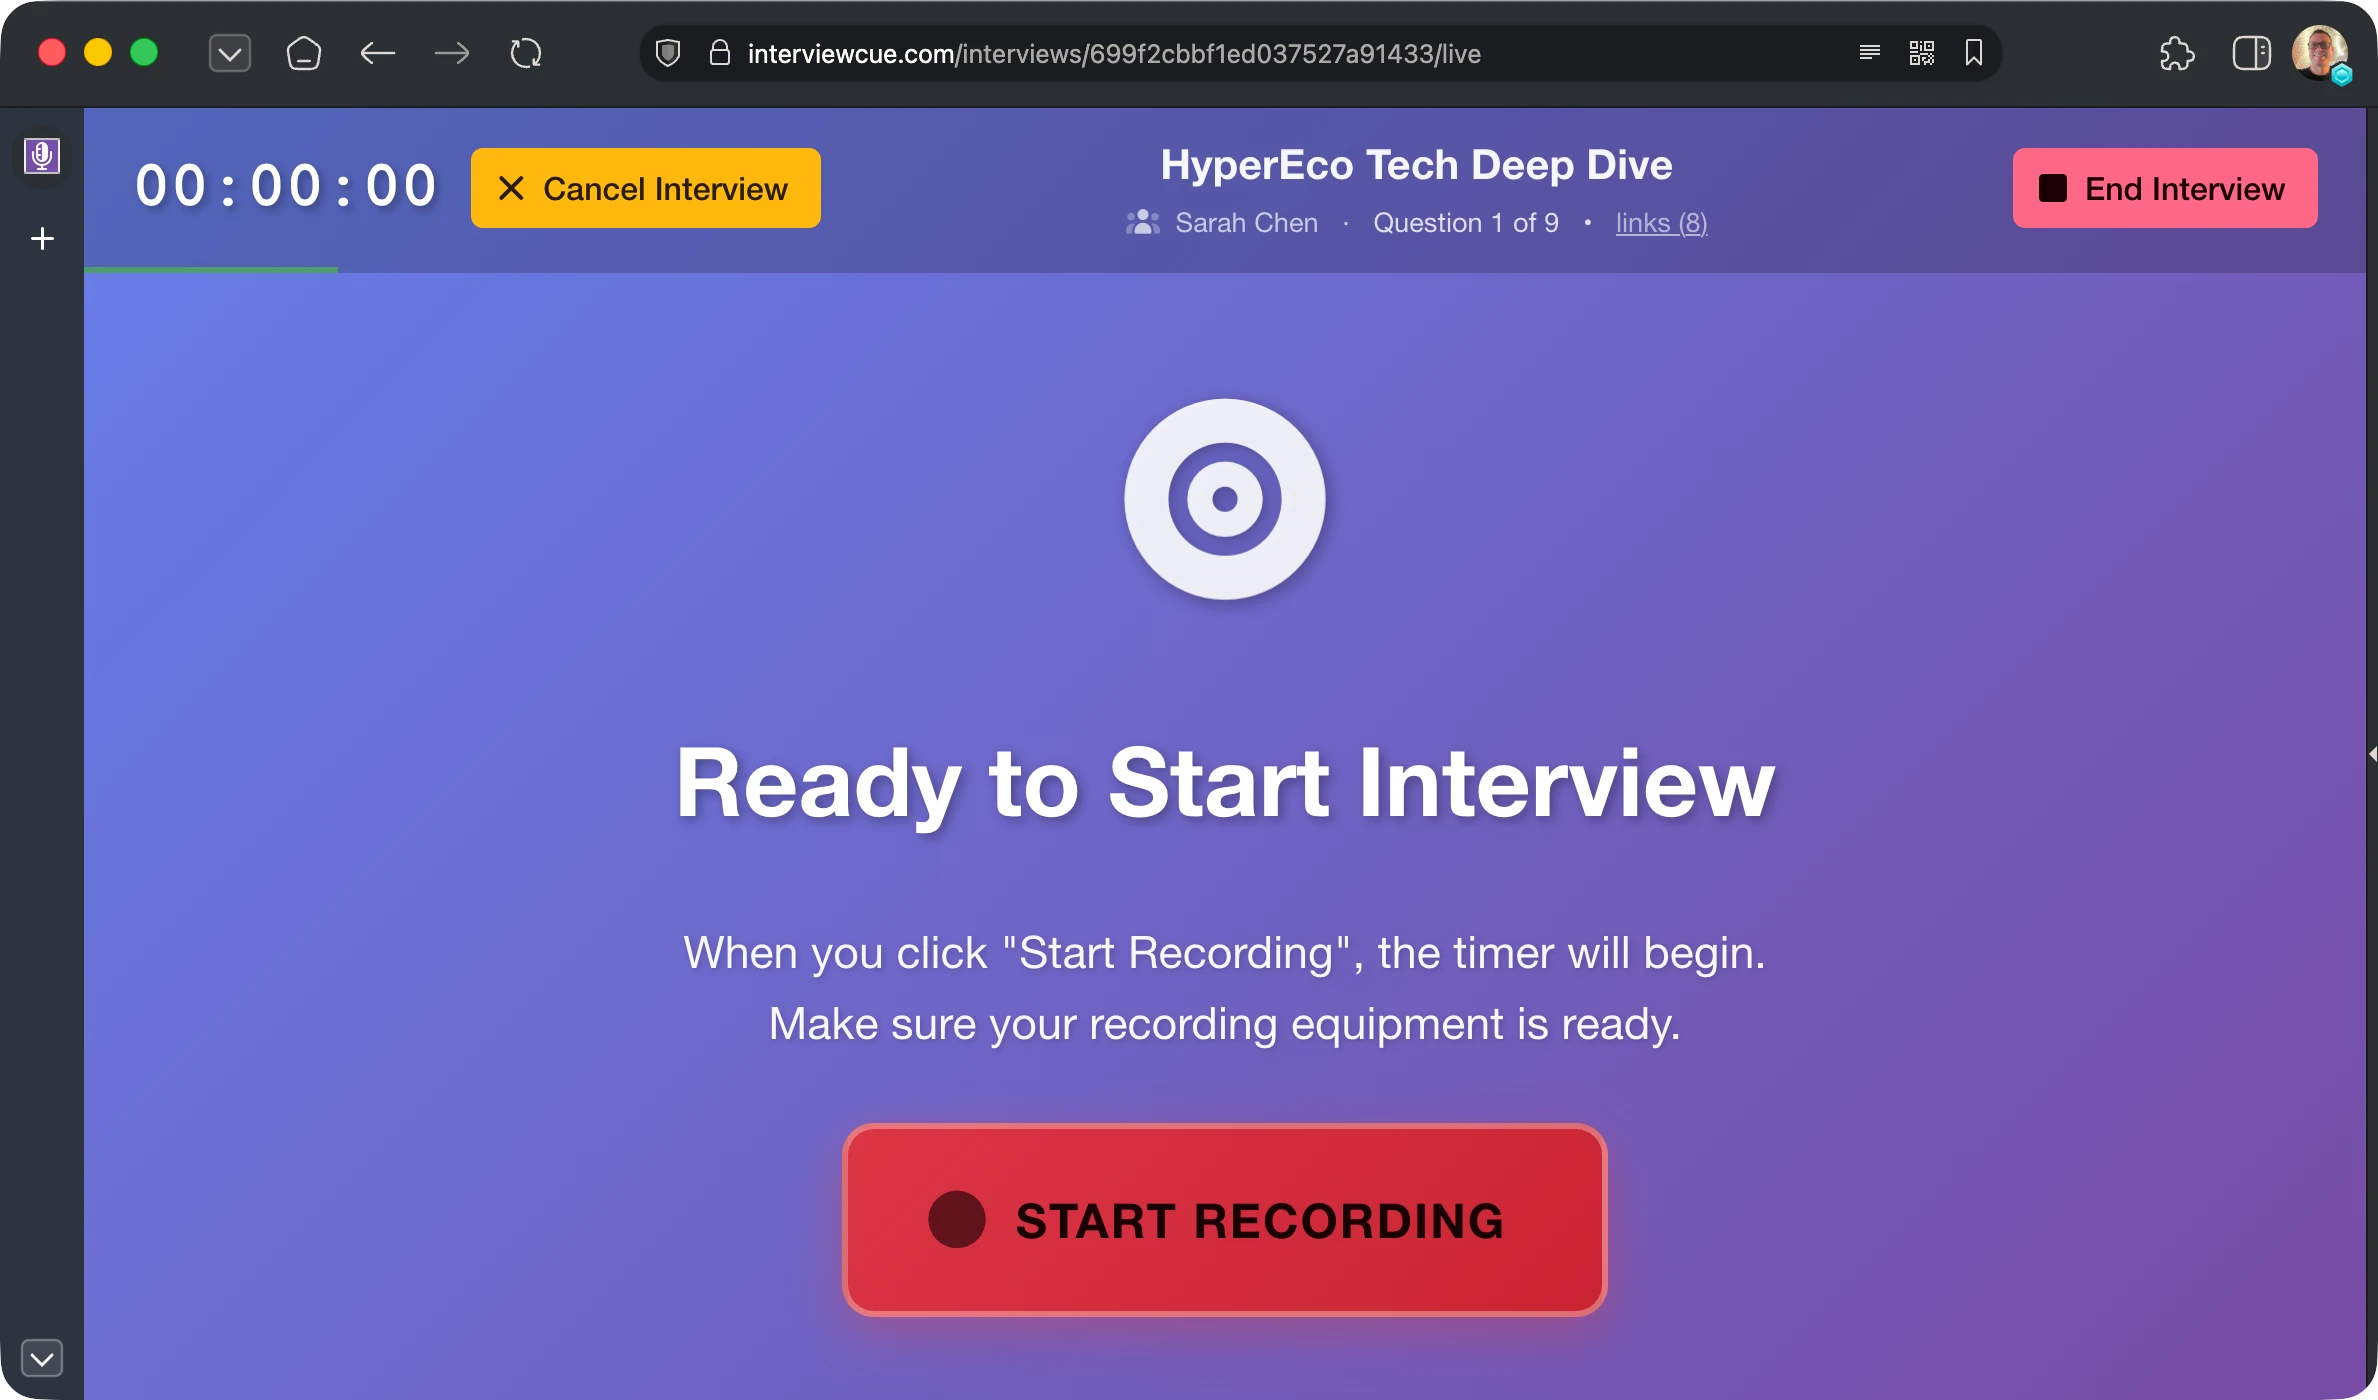
Now InterviewCue has queued up the interview so that you can press Start Recording in sync when you actually start recording. Whether this is a Zoom meeting, Streamyard, or basic recorder, you'll want the start of those two things to align as best as possible. So get this page ready before you start.
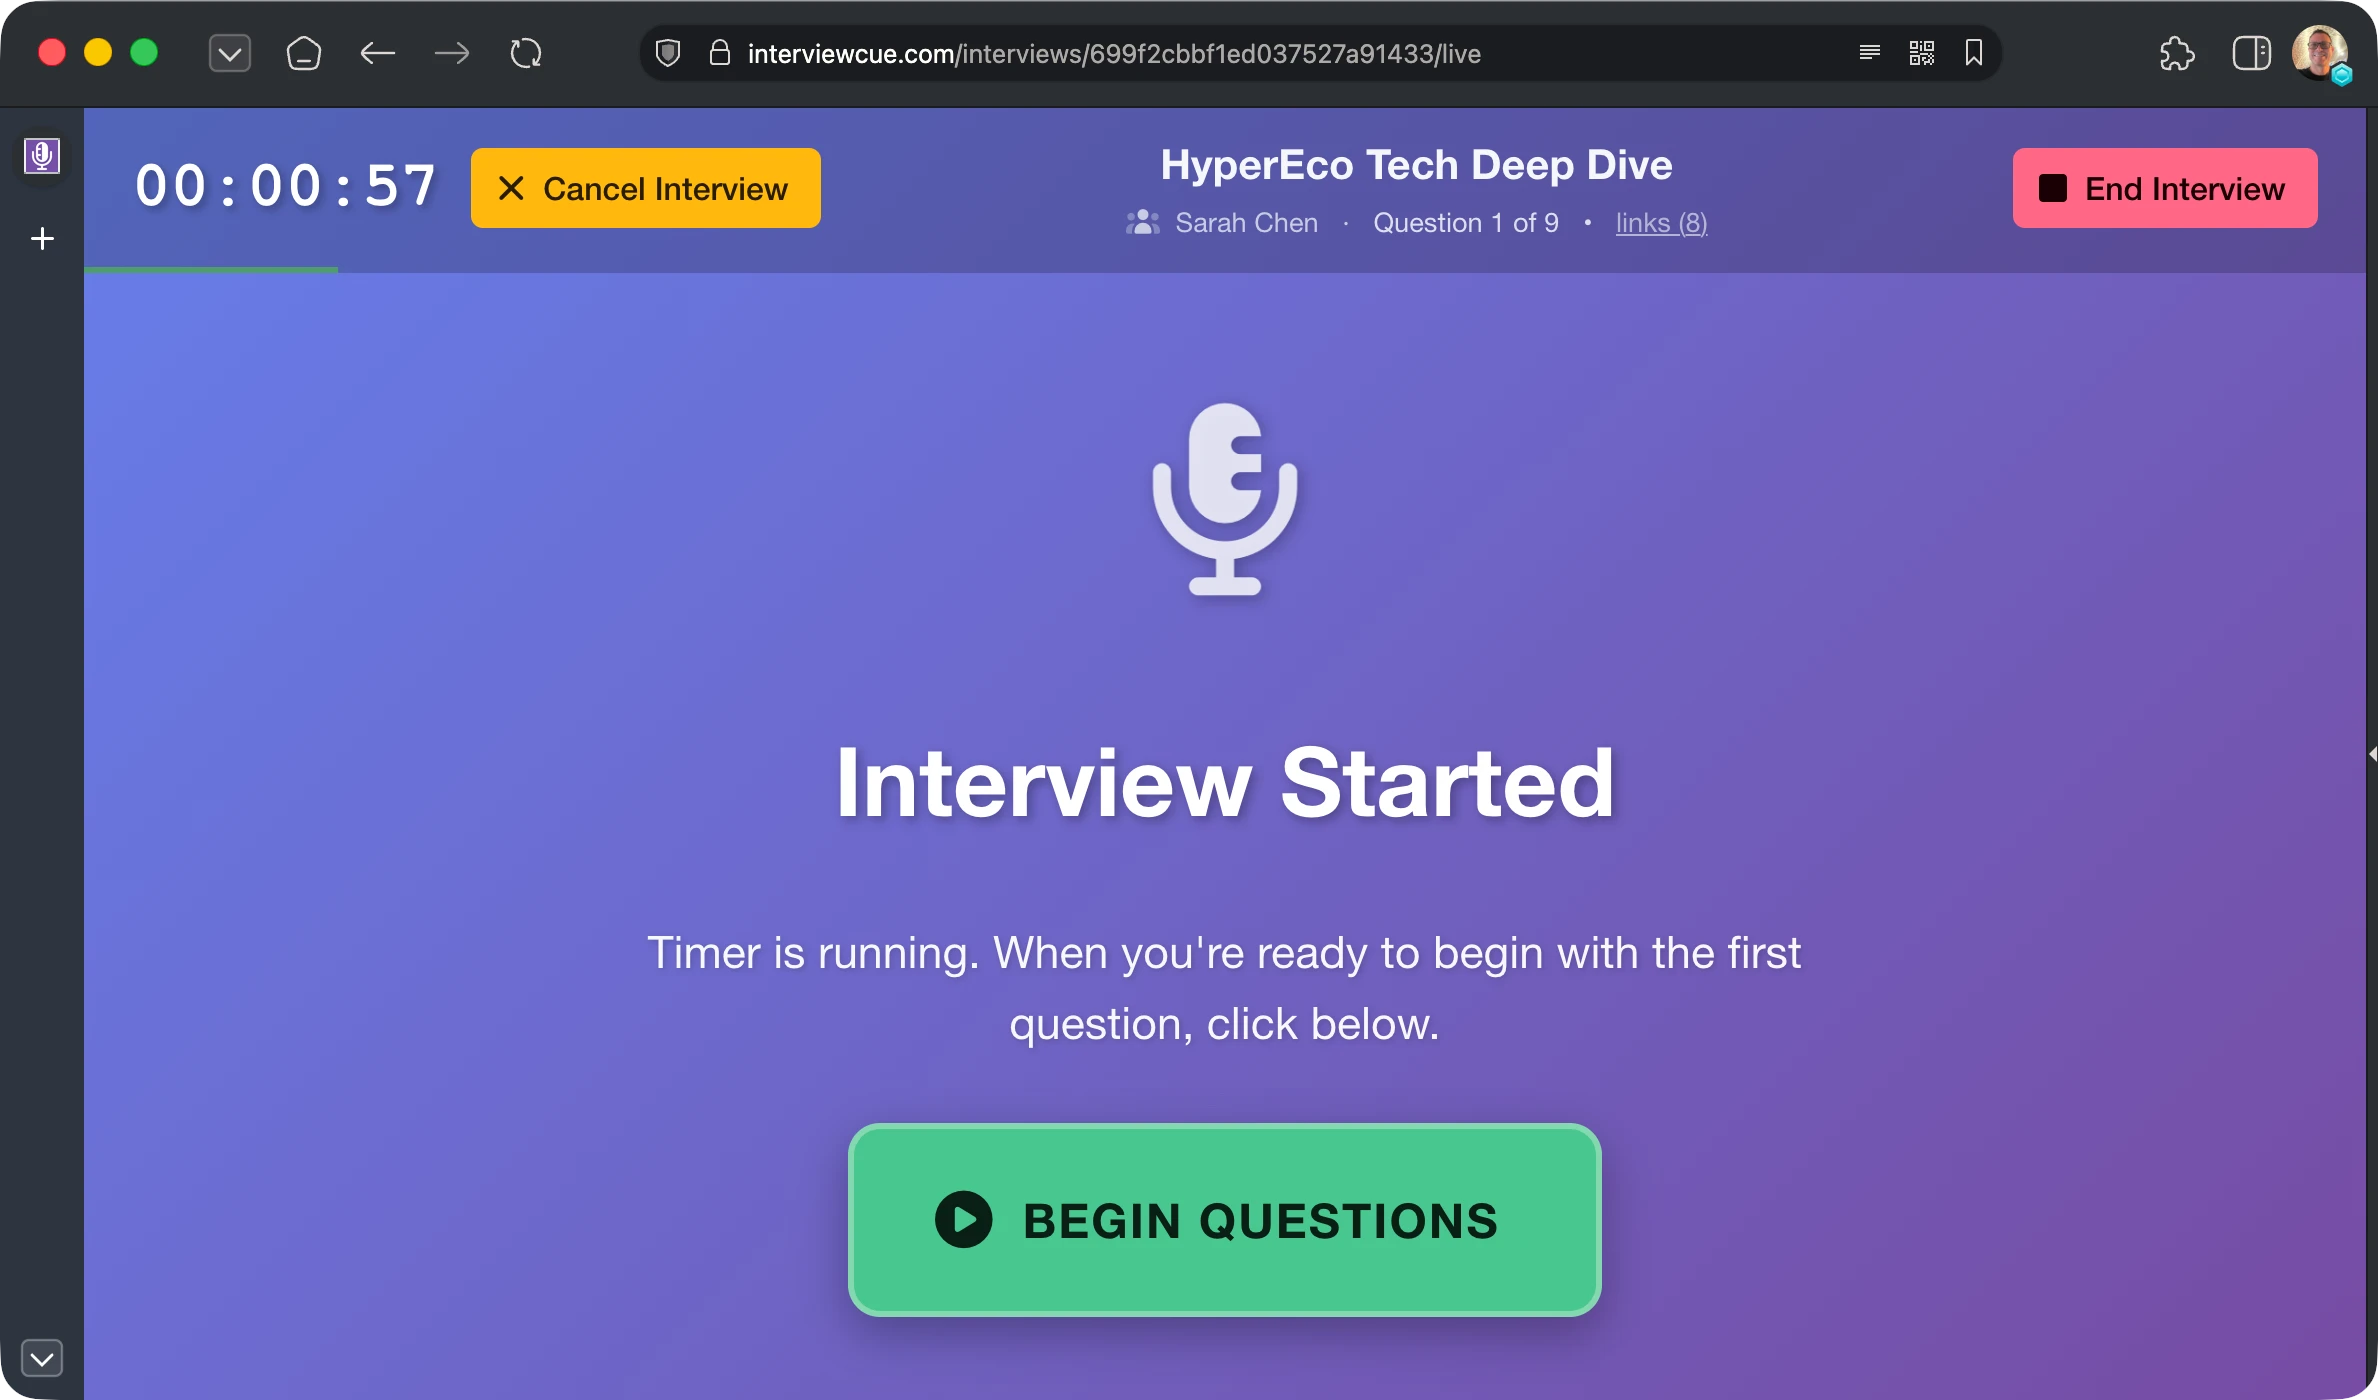
Pressing start begins the timer, which will be used to synchronize all events back to your audio timeline. Next you will see the Begin Questions screen.
Navigating Questions
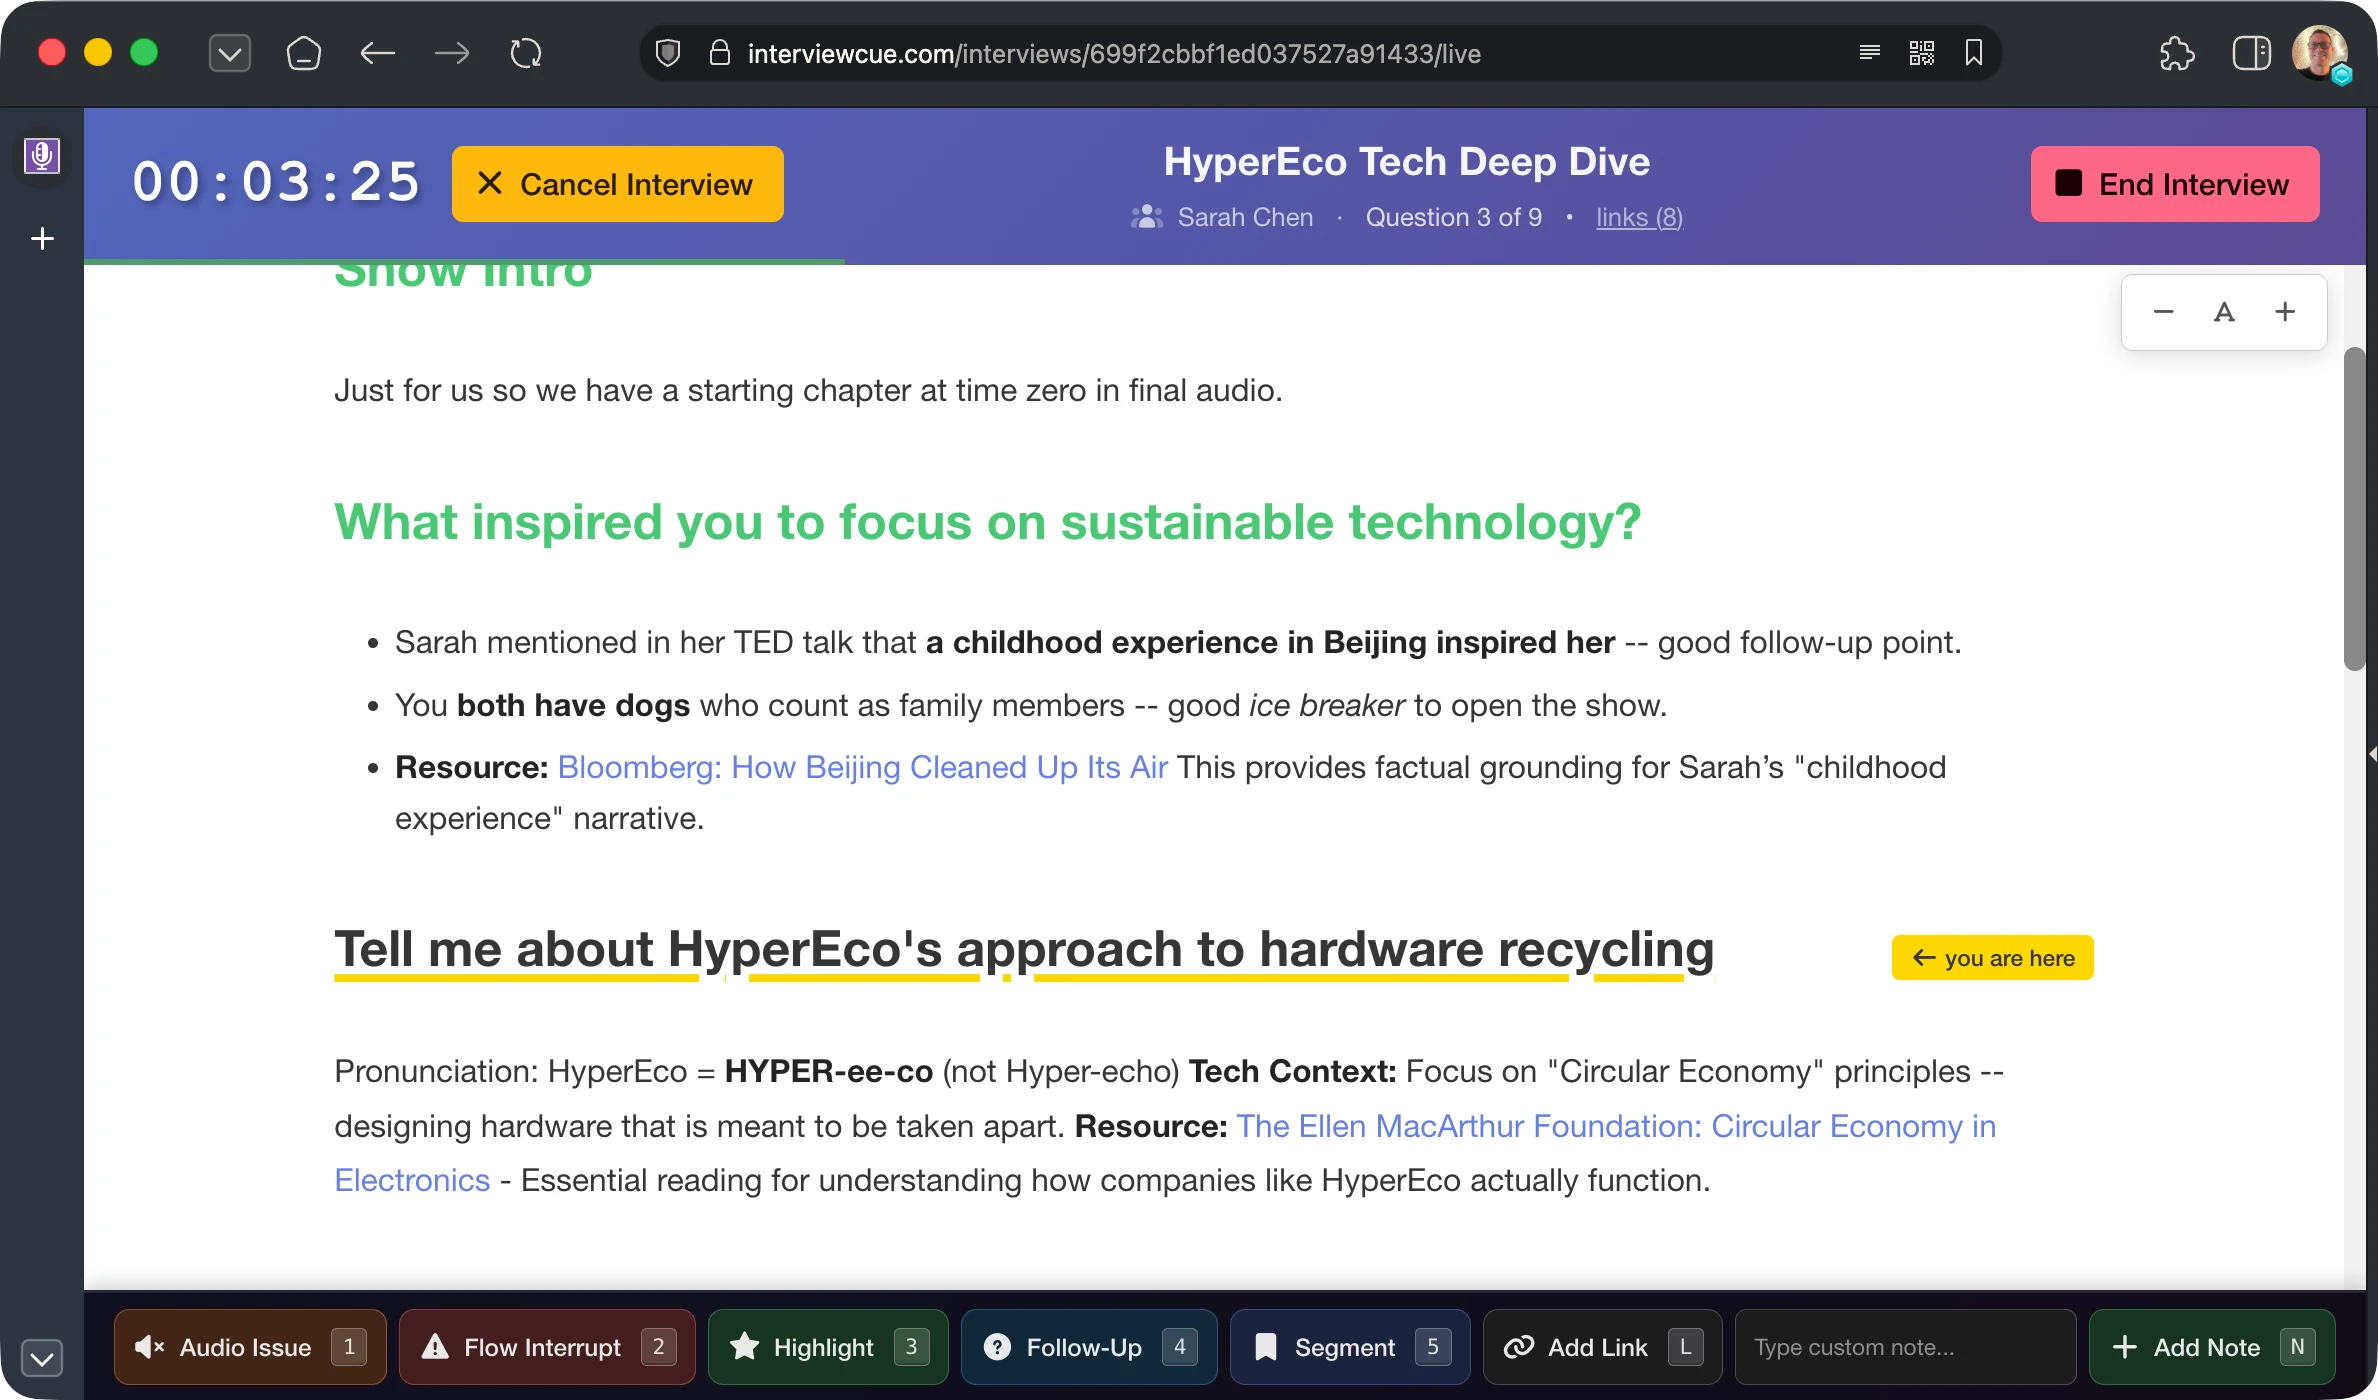
Once the questions have started, you're taken to a view very similar to Google Docs. You see the questions as headlines and the background info as paragraphs beneath them. But, this is also how you control the timing of the interview. You'll notice the yellow underlined question and you are here indicator. That is what InterviewCue thinks the current topic/question is.
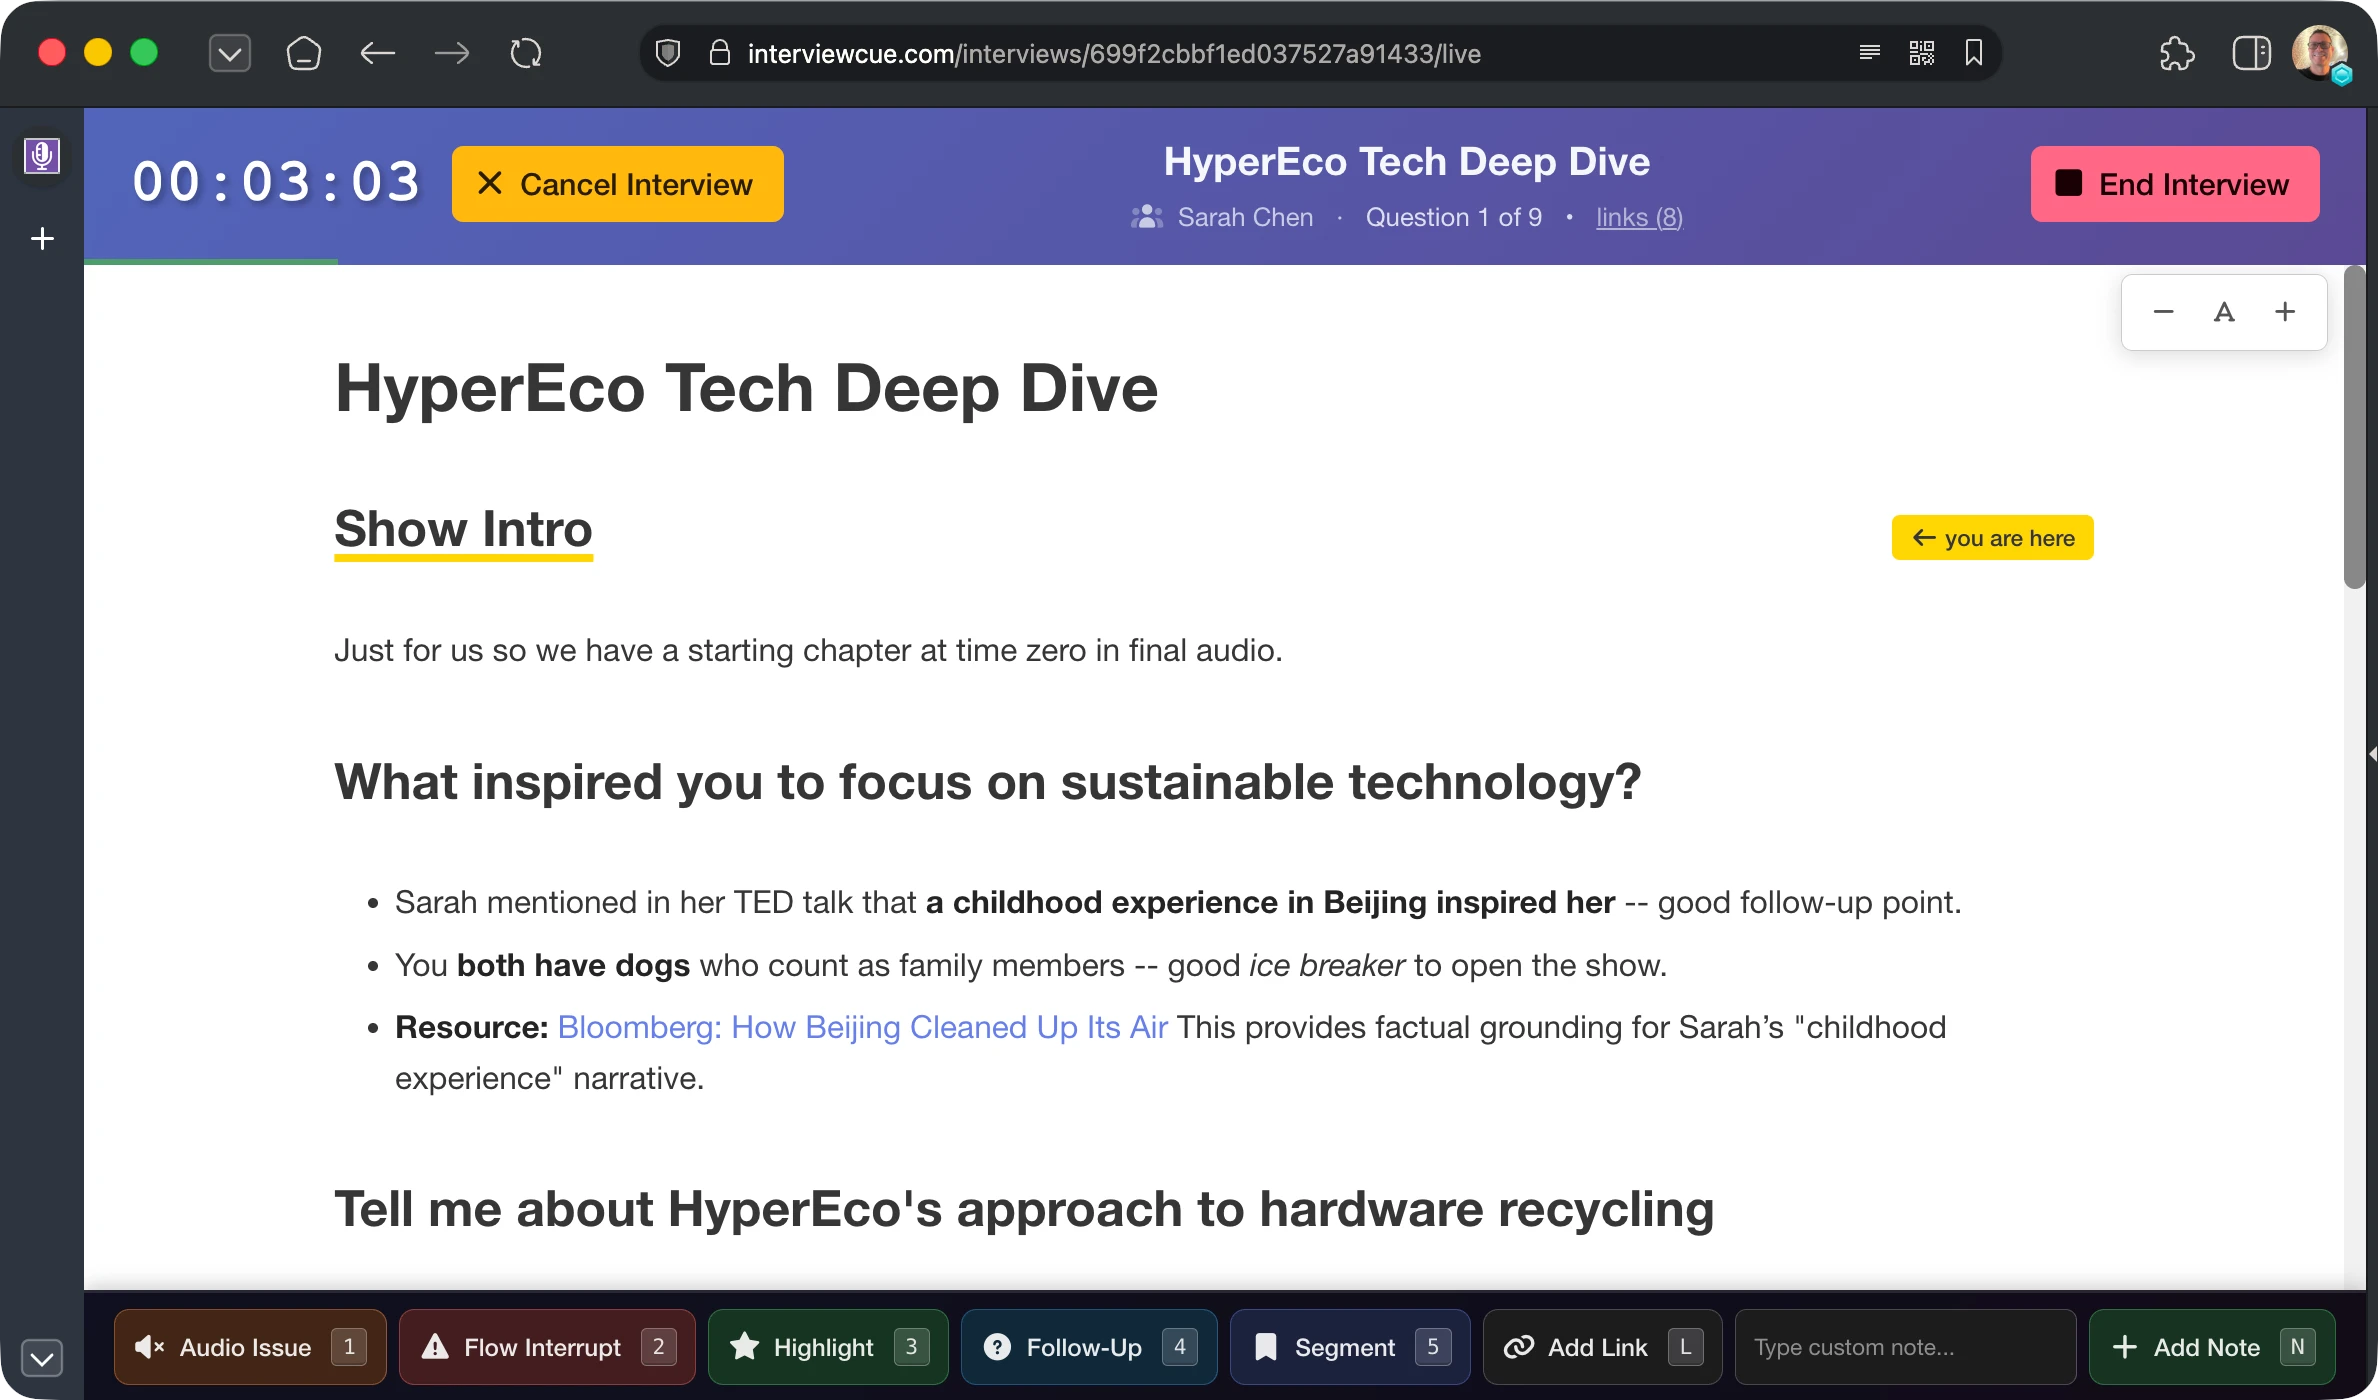
When it's time for the next question, just click/tap the title of the next question. InterviewCue will update the "you are here" pointer. Asked questions change to the green title.
More importantly, it will record the exact time you switched to that question. After the interview, these timings can be fine-tuned and will become chapters in your recording.
Visual Resources with Link Opener
Some interviews and podcasts have video components. Often, these shows share some representation of the topics being covered. Maybe it's the home page of a new technology being discussed. An article with a particular angle on the topic, or more.
InterviewCue comes with a Link Opener tool. This helps you gather all the links (resources) from the interview you have created. It opens them in a new window and allows you to organize the conversation around them.
While you can type / paste in the links directly, each interview has an Open in Tabs button in the Reference Links section of the interview details page that prefills the opener and links them back to your interview.
If you view these links from a logged in account, it will automatically discover your active interview and provide in-page controls. These are very helpful because you can record topic timing without even viewing the InterviewCue window.
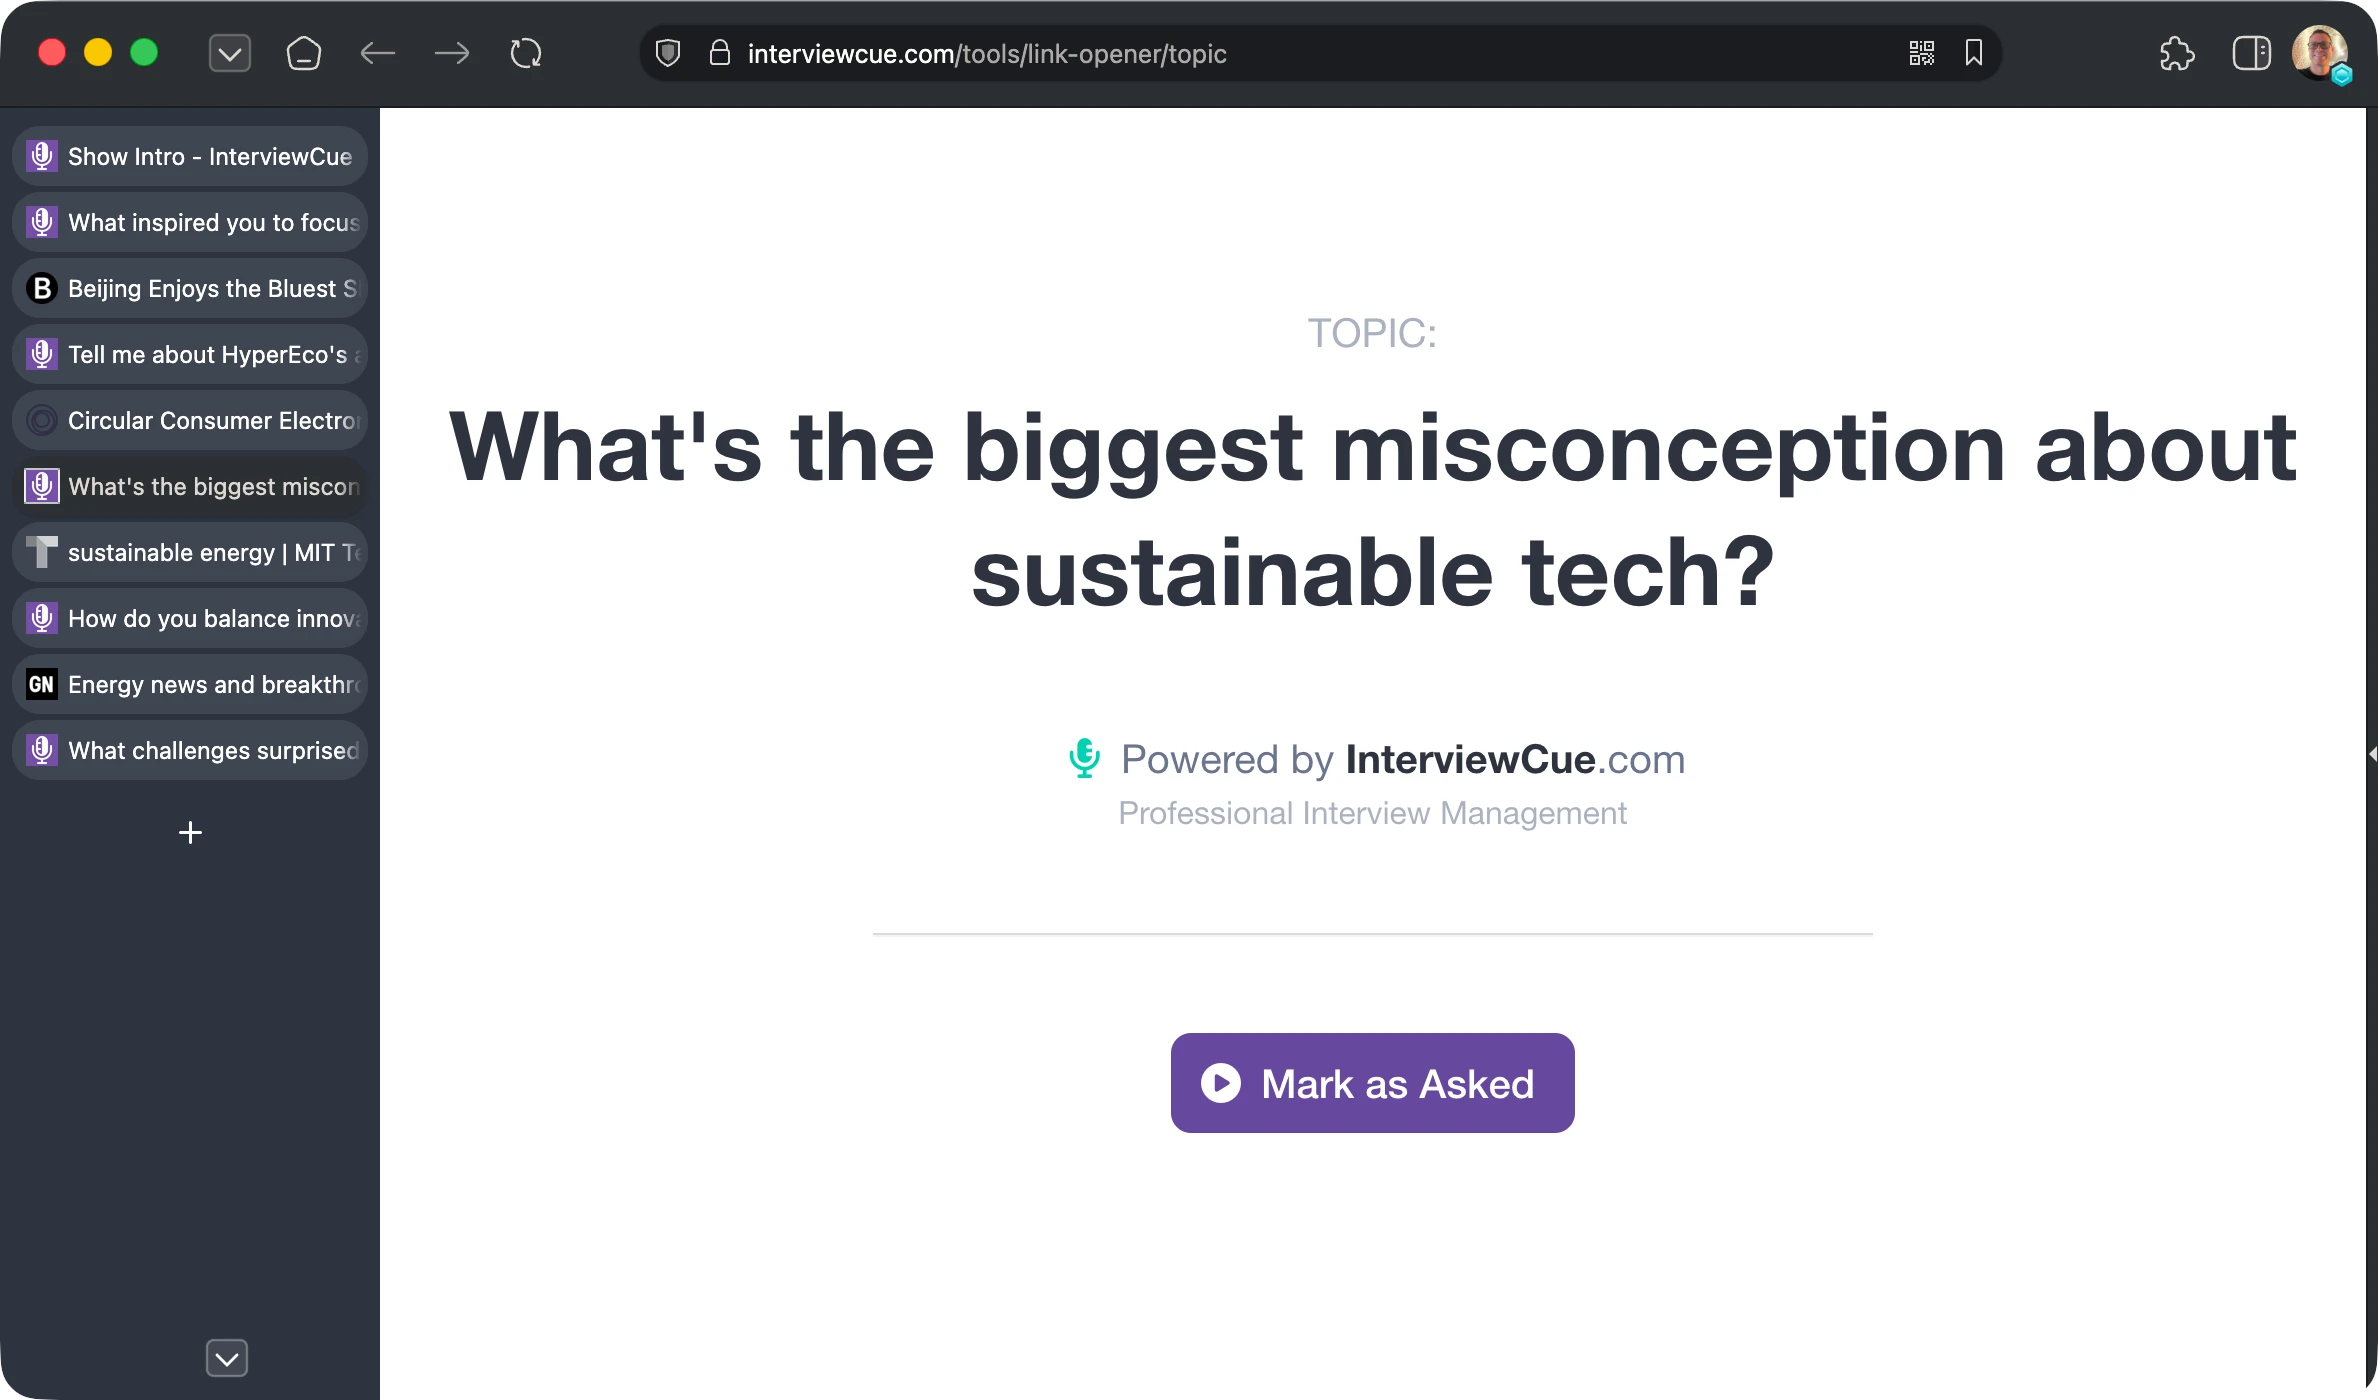
In this example above, when you ask "What's the biggest misconception about sustainable tech?" just press the purple Mark as asked button. InterviewCue records the timing and removes the button so you know that topic has been recorded.
When the interview is finished, press End Interview and you'll be taken to the next stage of your journey, post-production.
Stage 5: Post-Production
You had a great interview. Now it's time to gather links for the episode page, highlights for social media, quotes for the cold open, and edit out that awkward moment where you both talked over each other.
Normally, this is the dreaded side of interviews. But not with InterviewCue. It had your back and was not just guiding you through the interview, but recording everything along the way for just this moment.
When you end the interview, you're taken to the post-production page.
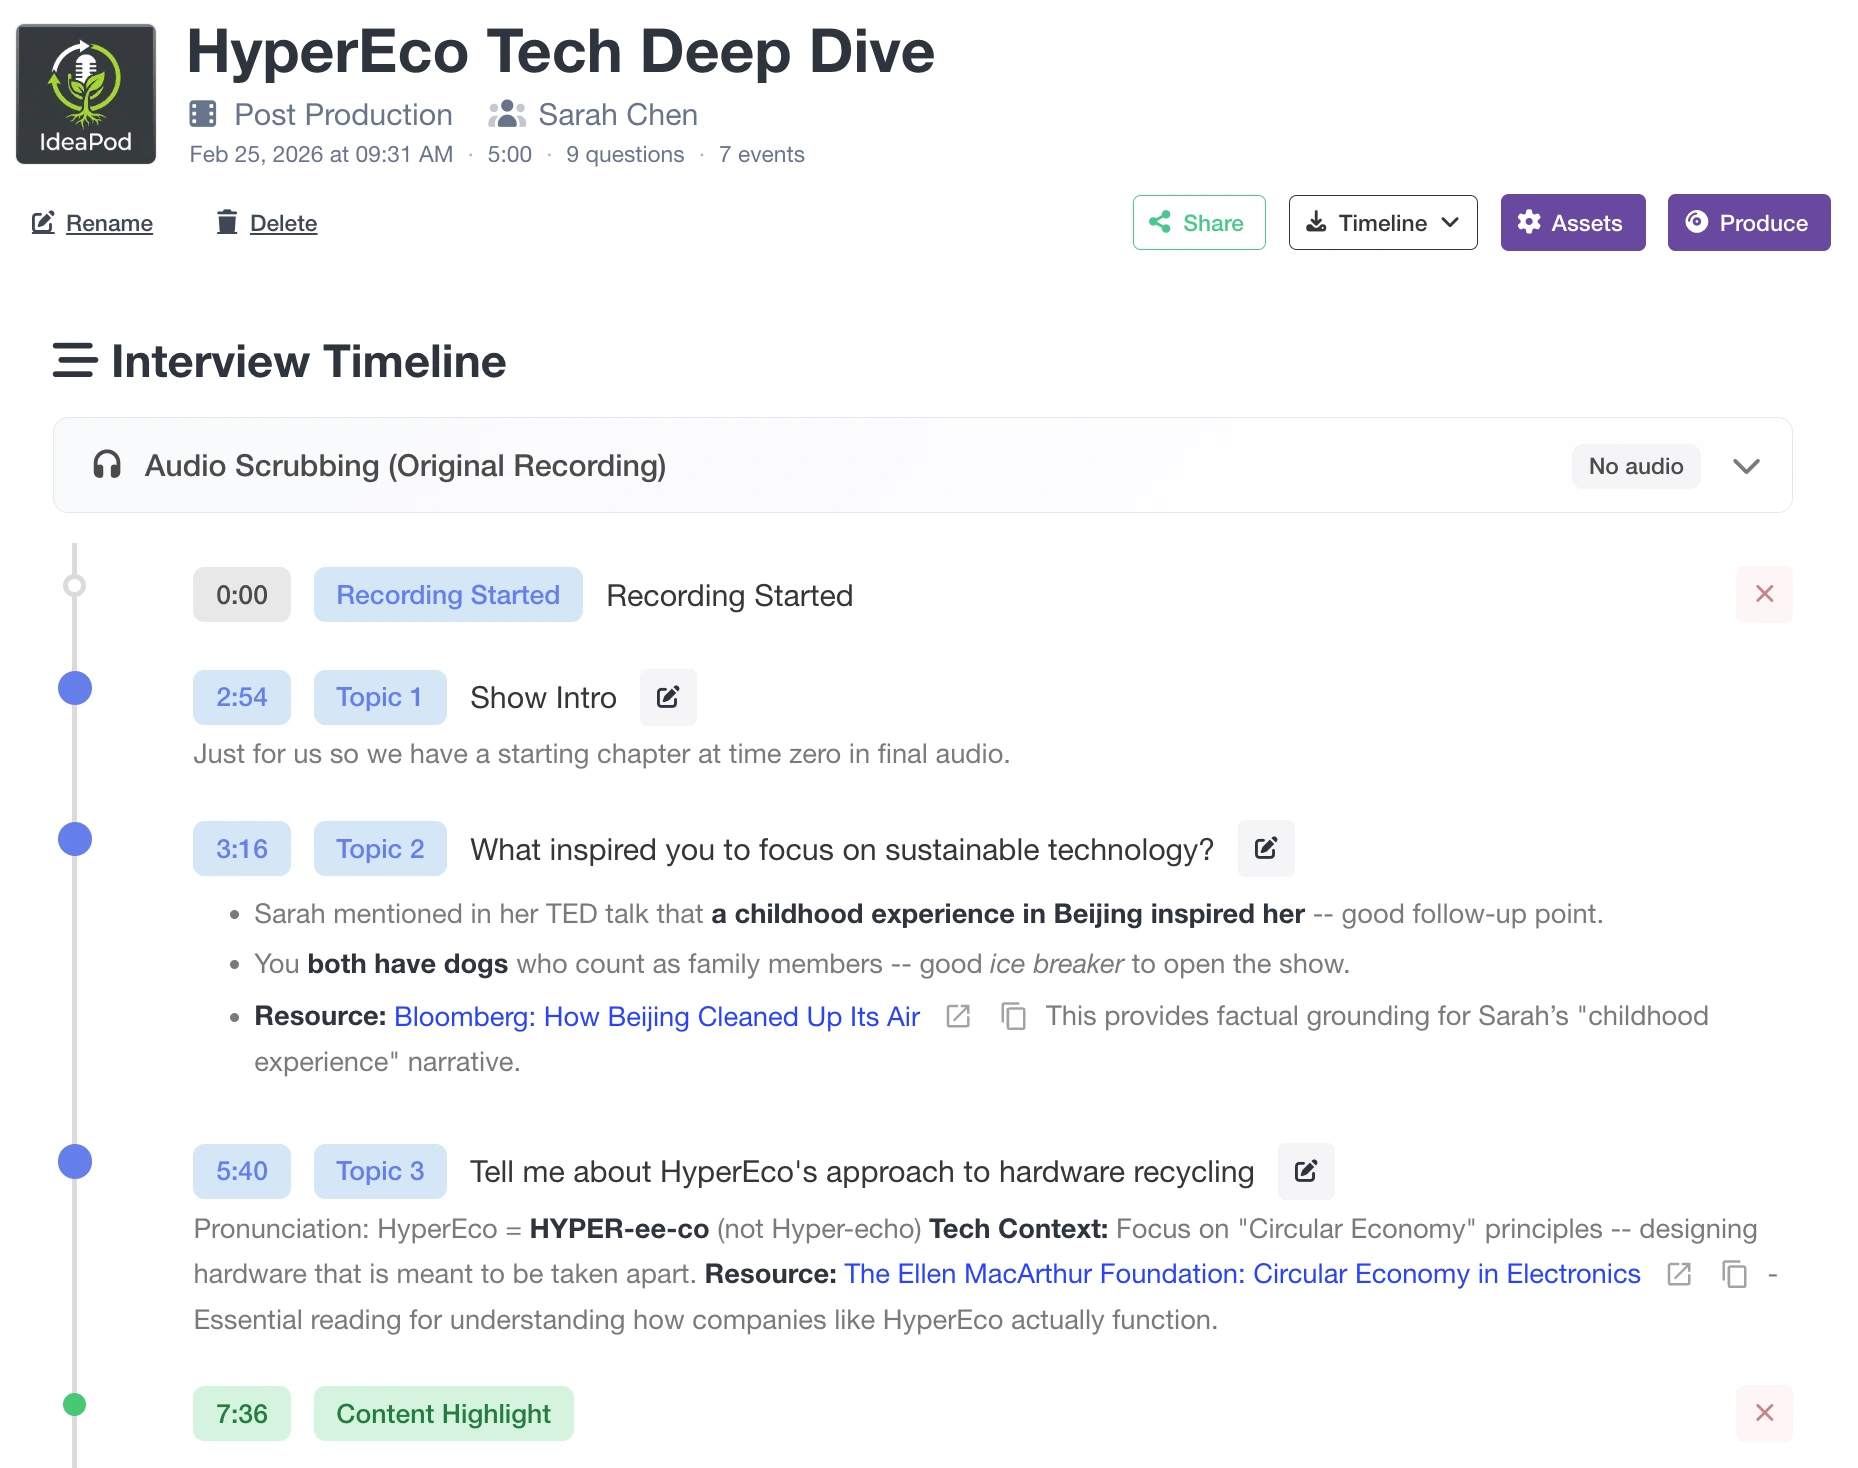
Here you can see the entire timeline of your interview: When it started, when the first question was asked, even content highlights that you indicated which might make a good hook for the intro or segment for social media. Events can even be added post recording if you realized you missed something.
But that's just the start. Next, we add the original audio and automatically generate transcripts.
Our next action is to press the Assets button to launch the Manage Interview Assets dialog. Drag our recorded audio to the original section. This can be an mp3 or many other audio / video formats. We'll convert it to an mp3 and store it for you.

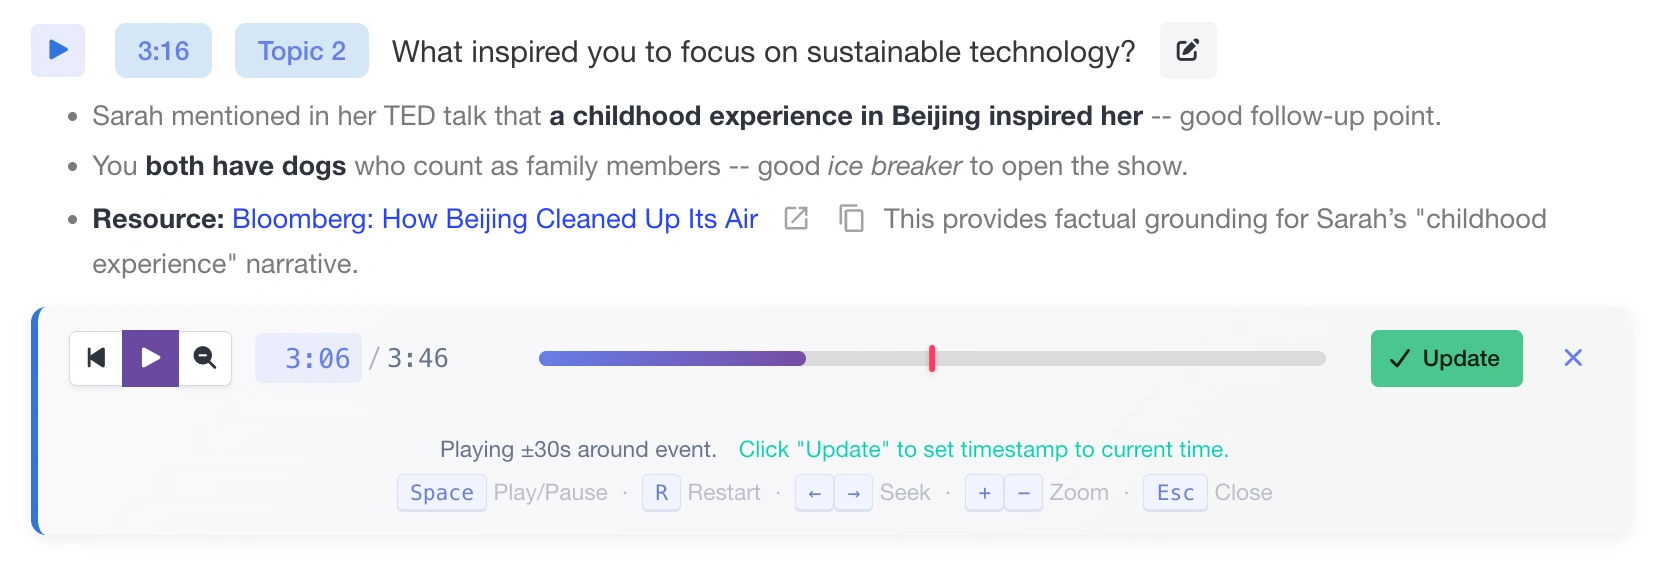
Once we have audio for your interview, we can use it to fine-tune each topic or highlight timing. Below is our audio scrubber interface. You press play and the app plays 30 seconds of time leading up to the event and 30 seconds after. You use the scrubber to find the exact time and press Update to set the per-second accurate time for your event.
The events in our post production page have been aligned perfectly with the actual audio (and delete extraneous ones). Now it's time to turn to the final, produced audio.
Use this page, the Timeline > Export * functionality as needed, to build your final, polished and edited audio track. This likely includes pre-rolls, post-rolls, ads, cold opens, and more. Whatever you usually release as part of your show.
Many shows would be happy to ship that final audio track as-is. But you can do a little more with InterviewCue before we call it done! Press the Assets button again to pull up the asset management dialog one final time.
Drag or browse to your final audio track in the final recording section of the dialog. And either upload, or allow InterviewCue to create, transcripts as well.
Once finished, you'll see a final interview timeline:
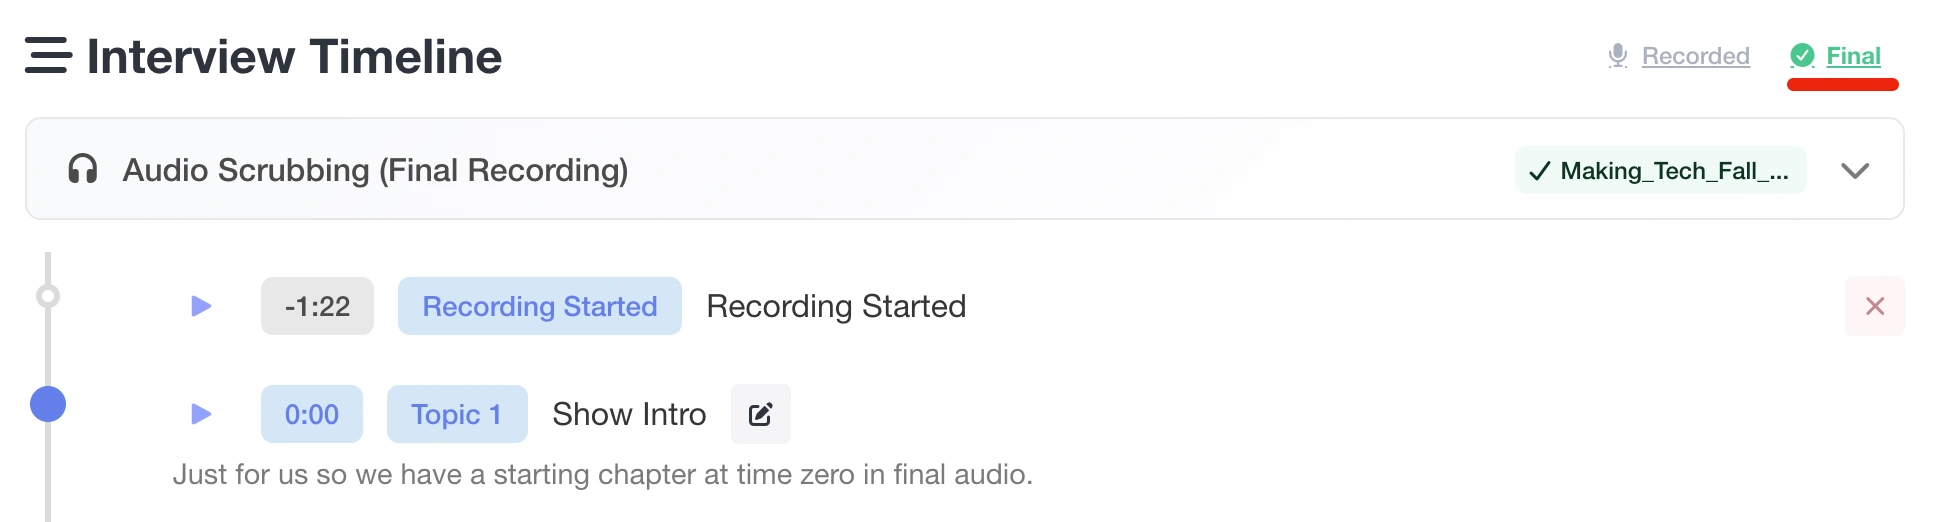
You can review the timing of each of the topics/questions again if you want to be sure they are just right. We adjust them for your new audio track based on the original plus our advanced sync algorithm. But they can be off slightly from time to time.
Then it's time to produce the episode!
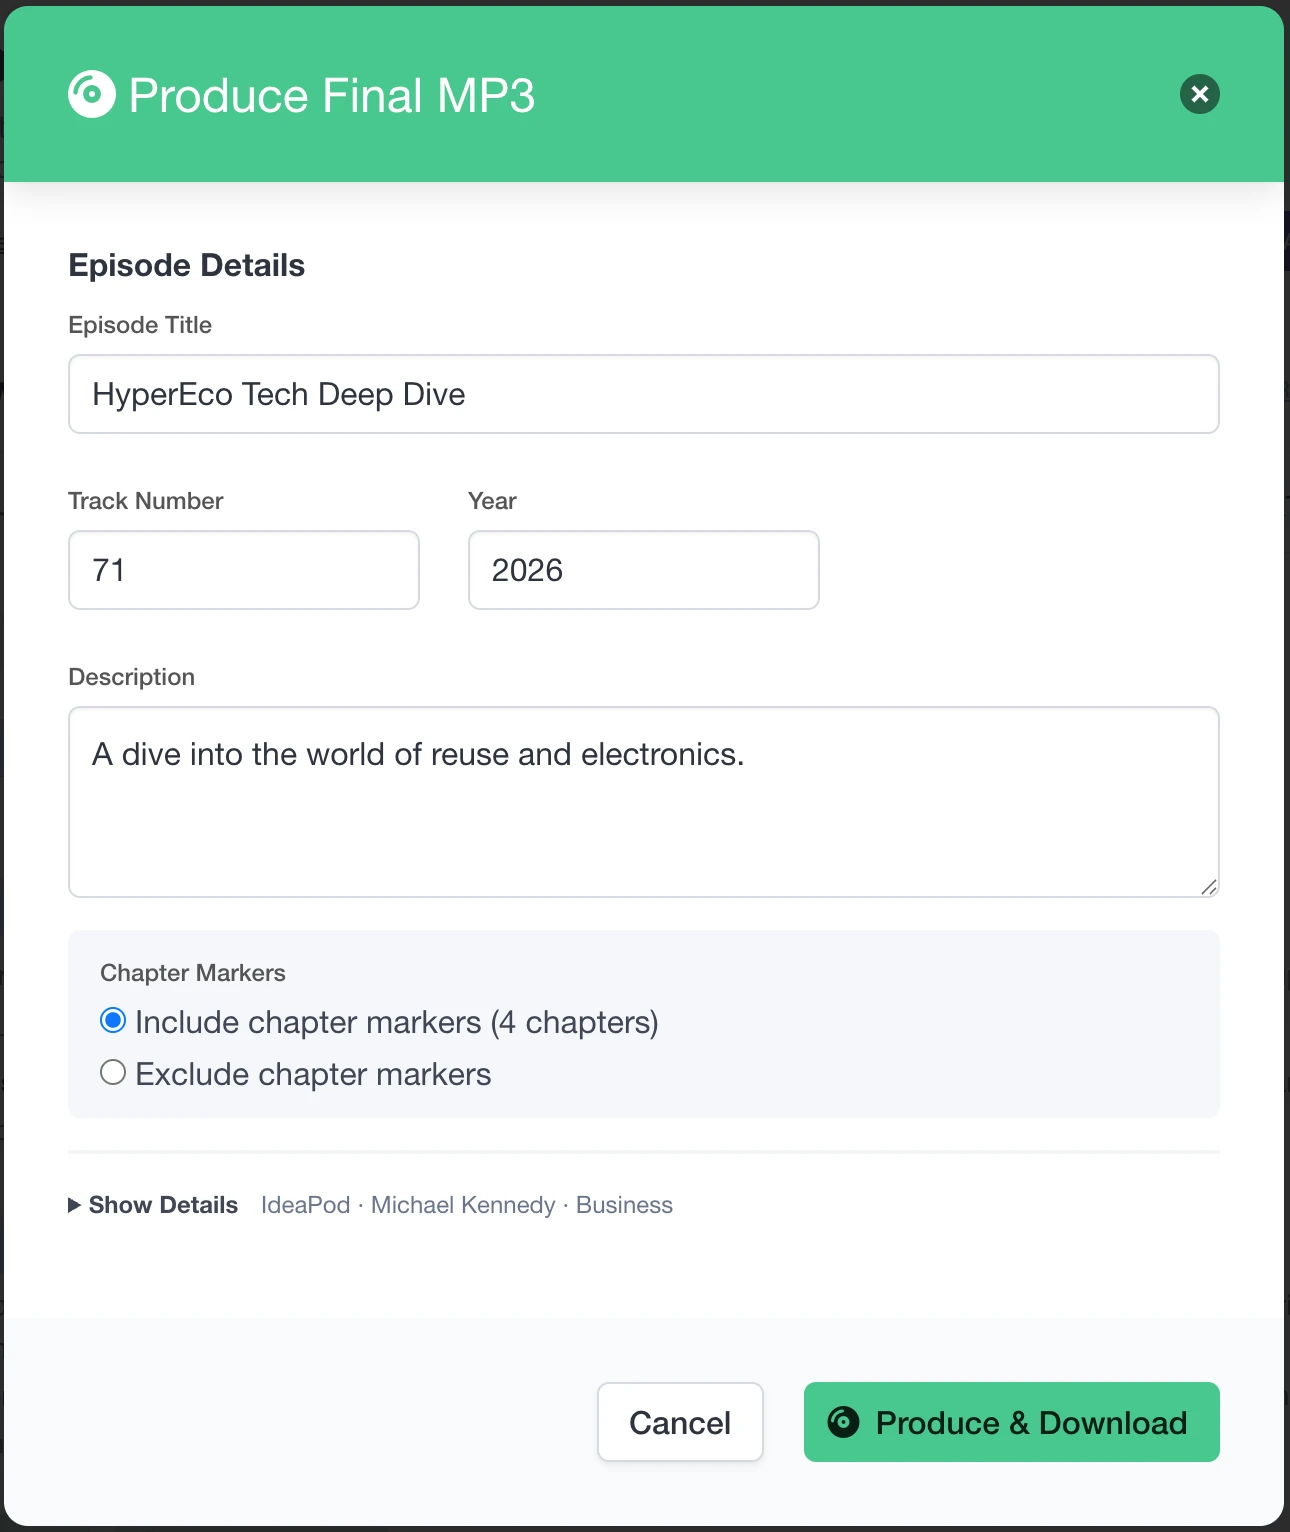
🎉 Congratulations 🎉 Your show is ready to share with your audience. It has all the metadata, show artwork, chapter (if you chose to include them), and more. Here is the final mp3 in macOS's file management tool (Finder).
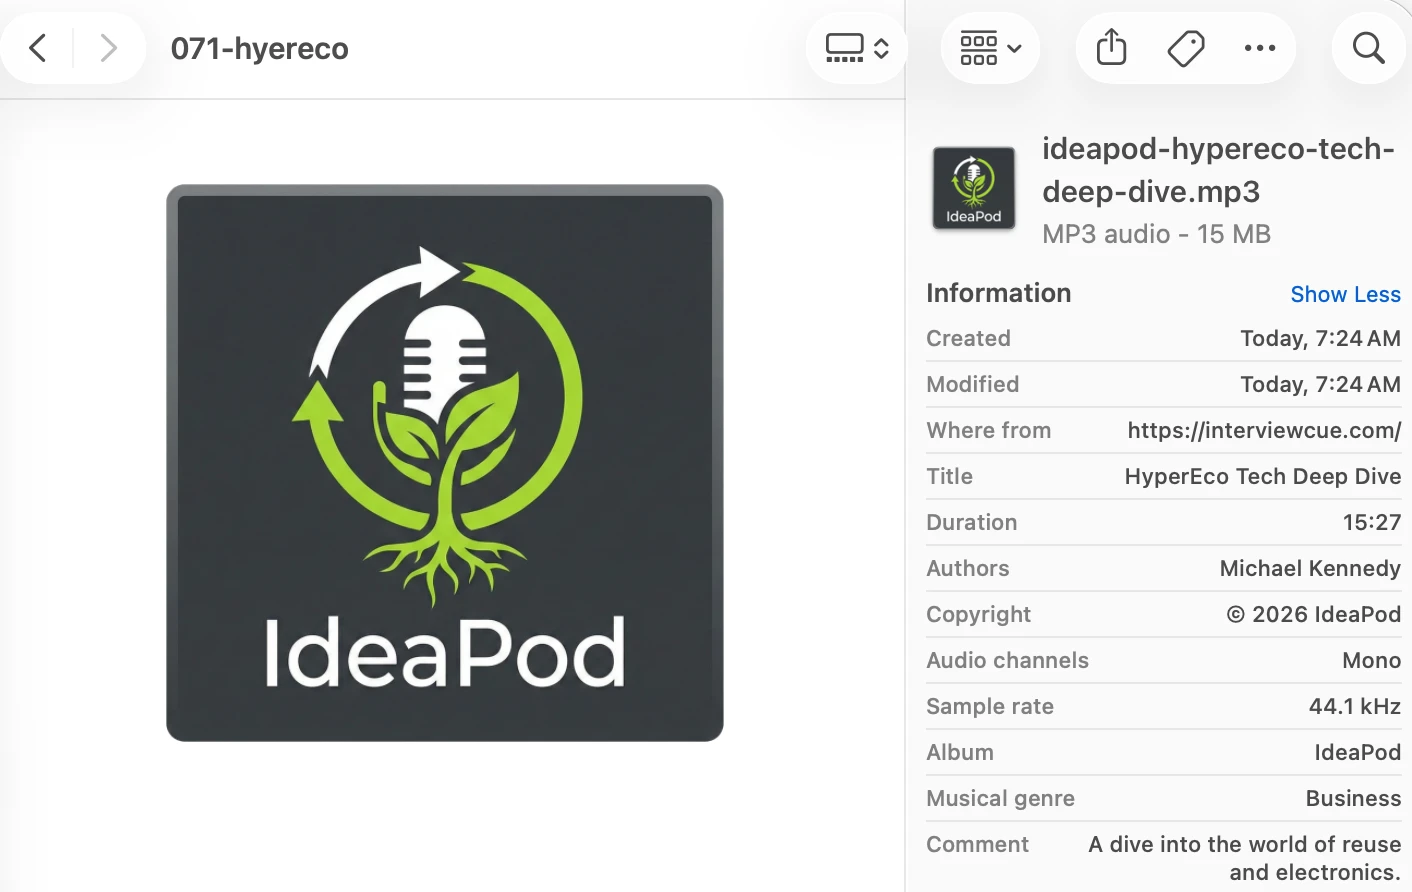
InterviewCue even ensures that we have the exact industry-standard encoding for your audio (44.1kHz, 128 kbps mono). This is more important than it appears at first. We've seen audio fail to playback on select podcast apps (not all!) if these values differ from the standard.
Conclusion
We have seen how InterviewCue has guided and enhanced your interview experience from idea to published.
- Idea - integration with popular doc services allows for friction-free outline creation and sharing
- Create - importing common and simple file formats allows zero-effort creation of interviews
- Refinement - our WYSIWYG editor and tools allow you to refine the interview
- Live interview - the UI keeps your outline and supporting information present and accessible
- Link opener - for shows that use shared browser views, link opener provides quick setup for visual support and integration back for event timing
- Post production - our rich post production page uses audio and transcripts to polish your audio in prep for editing or for final release
- Publish - embed show information, chapters, artwork, and more into a professional audio file ready for publication.
Ready to Try It Yourself?
Let's create some amazing interviews together! 🎙️